
Setting up a WordPress website on telaHosting is quick and easy with the help of Softaculous. This step-by-step guide will show you how to install WordPress effortlessly. Let’s dive in!
Step 1: Log in to Your telaHosting Account
- Go to www.telahosting.com.
- Enter your username and password, then click Log In.
- Once logged in, navigate to your hosting account dashboard.
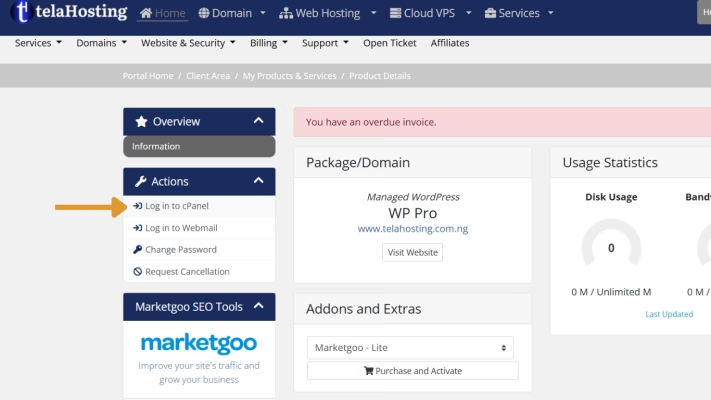
Step 2: Access Your cPanel
- From your dashboard, click Log in cPanel.
- This will take you to the cPanel interface, where you can manage your hosting account.
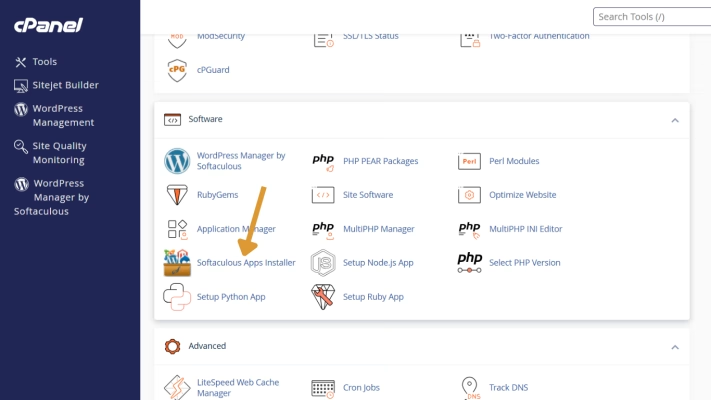
Step 3: Locate Softaculous Apps Installer
- In cPanel, scroll down to the Software section.
- Click on Softaculous Apps Installer.
Softaculous is a tool that allows you to install applications like WordPress with just a few clicks.
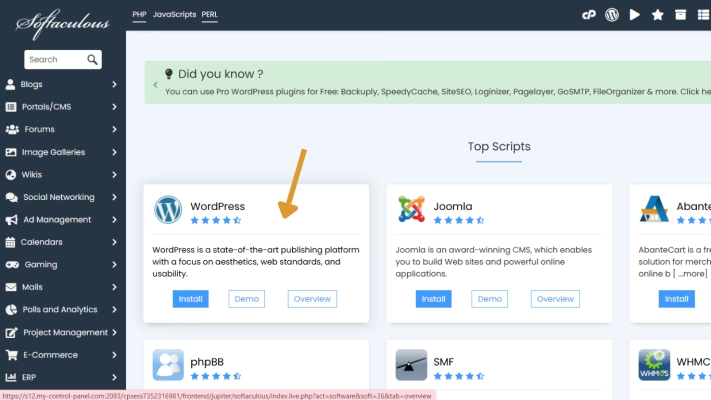
Step 4: Select WordPress
- Inside Softaculous, find WordPress under the popular scripts section, or search for it using the search bar.
- Click on the WordPress icon to begin.
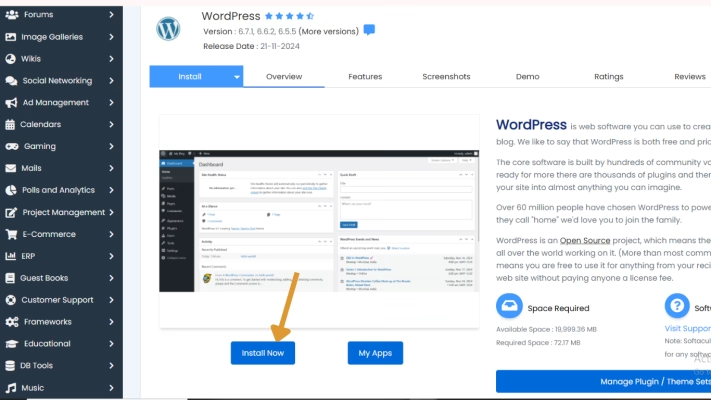
Step 5: Start the Installation
- Click on Install Now to start the installation process.
- You’ll be taken to the setup page, where you can configure your WordPress installation.
Step 6: Configure Installation Settings
1. Software Setup
- Choose Protocol: Select
https:// if your site has an SSL certificate or http:// otherwise.
- Choose Domain: Select the domain where you want to install WordPress.
- In Directory: delete wp from the box if you want WordPress installed at the root of your domain (e.g.,
www.yourdomain.com).
2. Site Settings
- Site Name and Description: Enter the name of your site and a brief description (you can change these later).
3. Admin Account
- Admin Username and Password: Create a username and strong password for logging in to your WordPress dashboard.
- Admin Email: Provide a valid email address for site management notifications.
4. Enter the email if you are installing for someone, so they can get the details. then click Install.

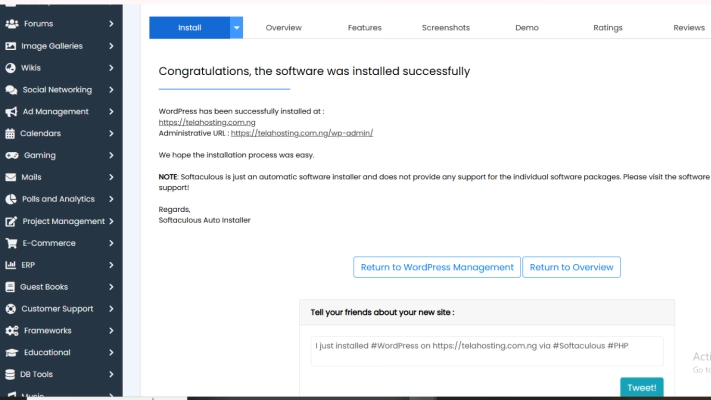
Step 7: Complete the Installation
- Double-check your settings, then click Install.
- Wait a few moments while Softaculous sets up WordPress.
- Once done, you’ll see a success message with links to your website and WordPress admin panel.
Step 8: Log In to Your WordPress Dashboard
- Click on the admin panel link (e.g.,
www.yourdomain.com/wp-admin).
- Enter the admin username and password you created earlier.
- Welcome to WordPress! You can now start customizing your site.

And that’s it! You’ve successfully installed WordPress on telaHosting. Happy blogging and website building! 🌟


Need help? Our friendly support team is always here for you! Reach out below.
Happy hosting! 🌟