Securing your website with an SSL certificate is crucial for protecting user data and building trust with visitors. This guide will walk you through the steps to install an SSL certificate on your website using telaHosting. Let’s get started!
Step 1: Log in to Your telaHosting Account
- Visit www.telahosting.com and log in with your username and password.
- Navigate to your Dashboard.
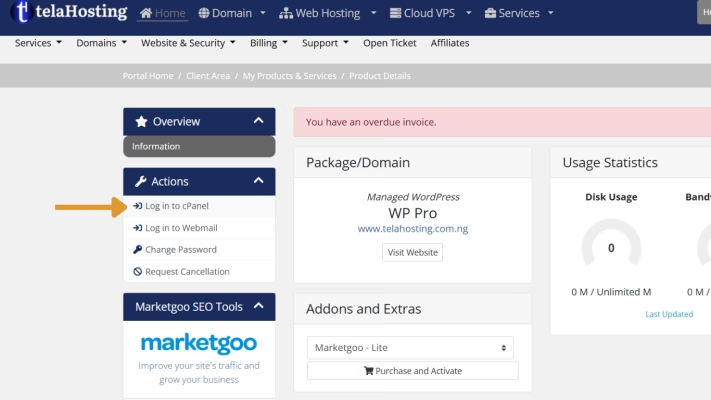
Step 2: Access Your cPanel
- In your telaHosting dashboard, locate your hosting plan.
- Click on Log in to cPanel to open the cPanel interface.
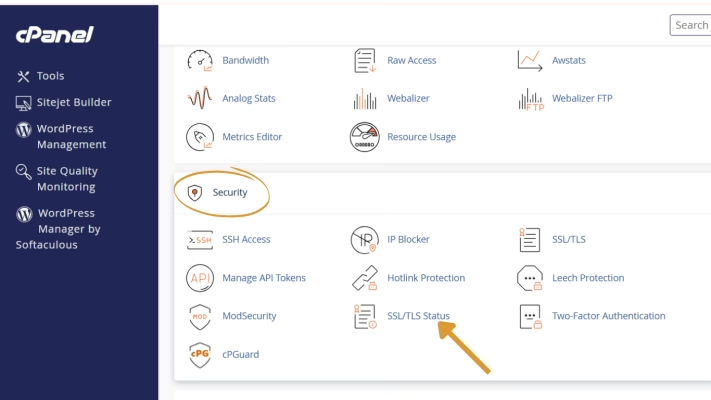
Step 3: Navigate to the SSL/TLS Section
- In cPanel, scroll down to the Security section.
- Click on SSL/TLS status.
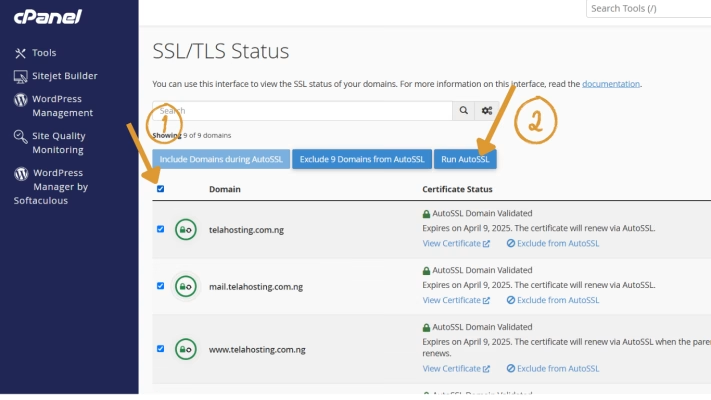
Step 4: Select “Domain and Run AutoSSL for Your Site.”
- Under the SSL/TLS Status, check the Domain box to select your domains.
- After you select the domain, click on Run AutoSSL.
- It will start running automatically. And when it is done, it turns from red to green.
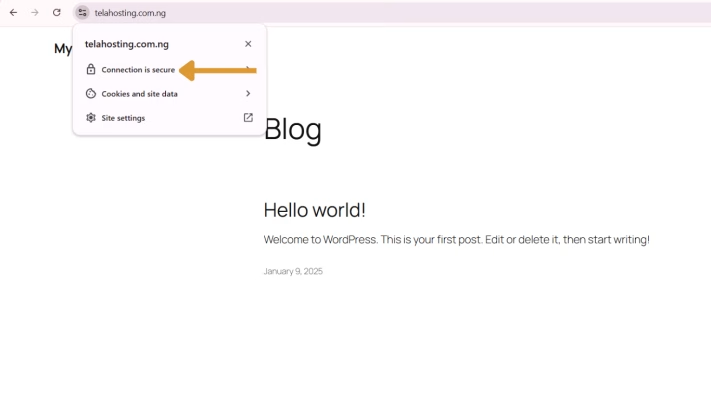
Step 5: Verify Your SSL Installation
- Open your website in a browser and check for the padlock icon in the address bar.
- Ensure your site URL starts with
https:// instead of http://.
Pro Tip: Use online SSL checkers to confirm your certificate is installed correctly.
With your SSL certificate installed, your website is now secure and trustworthy for your visitors. Well done! 🌟


Need help? Our friendly support team is always here for you! Reach out below.
Happy hosting! 🌟