

$14.11 /1 yr

$17.49 /1 yr

$13.74 /1 yr

$3 /1 yr

Sitejet Builder is a professional, beginner-friendly, low-code/no-code site builder seamlessly integrated within the cPanel control panel to streamline the web design process. It combines a powerful Sitejet Website Builder (content management system) with collaboration tools, allowing users to build, manage, and deliver stunning websites efficiently using the drag-and-drop editor that provides:
140+ professional, fully responsive, customizable, fast, and SEO-friendly templates
AI-assisted content creation option
Free stock photos and videos
Automated & manual backups
Free weekly SEO checks
PLEASE NOTE: To make your website available worldwide, you must point the domain to the server.
Keep reading to learn more about how to build a website with Sitejet Website Builder.
To start working with Sitejet Builder, log into your hosting cPanel account. Your cPanel login details differ from the telaHosting account login and were included in your Hosting Welcome Email.
If you don’t have this to hand, you can reset your cPanel password or contact customer support for further assistance. You can access your cPanel from http://yourdomain.tld/cpanel or https://servername:2083 (check what server your account is hosted on here).
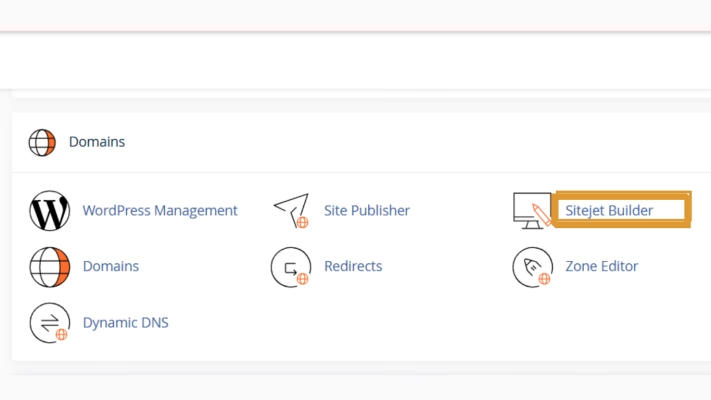
For quick access to Sitejet Builder, you may use our cPanel Shortcuts. In cPanel, go to the Domains section > the Sitejet Builder menu:
In the next menu, you’ll see a list of all the domains associated with your hosting account. For each domain, you can take actions to manage your website, preview it, choose a new template for your website, or build a new website using the Sitejet Website Builder (CMS):
To start the website creation, select a domain or subdomain for the future website and click the “Try Sitejet” button:

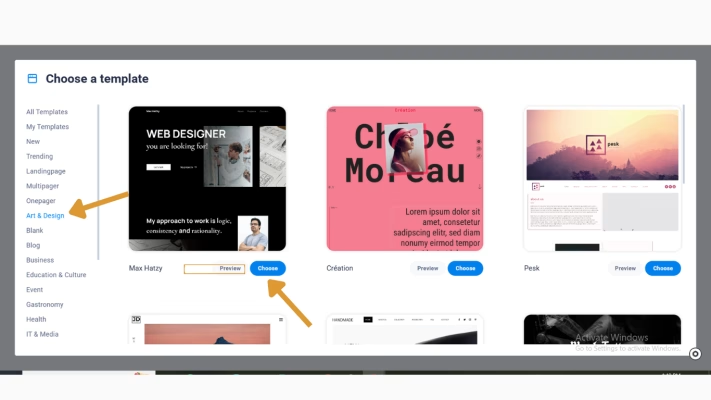
After that, you will be redirected to the “Choose Template” page, where you can select a template:
You can filter template options by selecting a category from the list. Click on choose or view to select a template.
Once you have selected a template, the system will redirect you to the Sitejet Website Builder (CMS) website with the applied template. It will look like this:
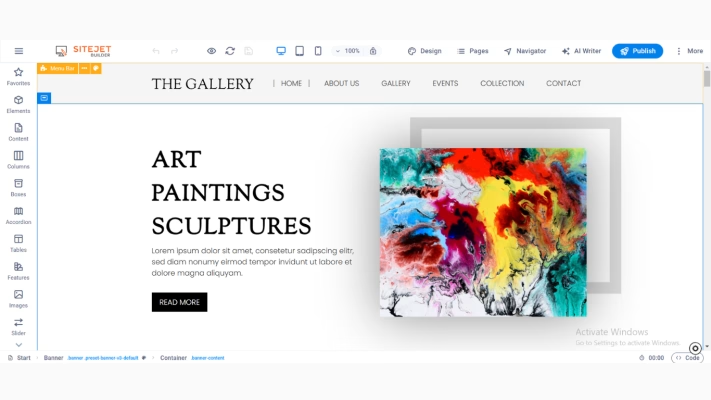
At the top of the page, you can see different menus that allow you to edit the template to customize your site:
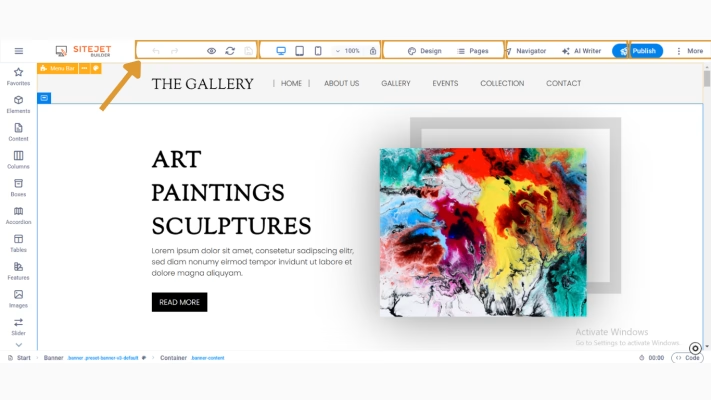
Let’s start at the left side of the top navigation. The first two buttons, Undo (Ctrl + Z) and Redo (Ctrl + Y), are self-explanatory.
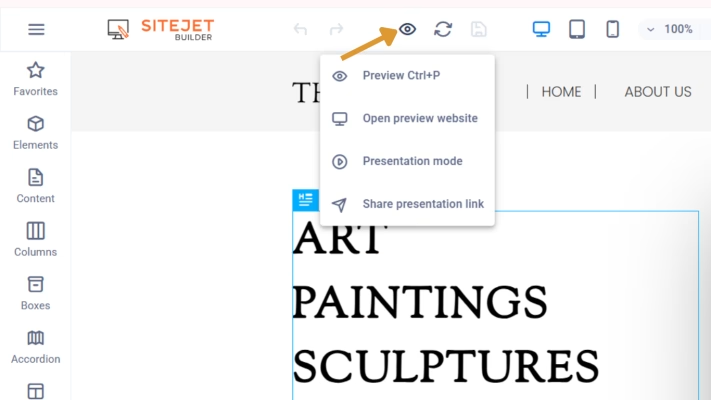
Eye icon (or use Ctrl + P), you can preview the website within the website editor. This preview feature within the website editor allows you to check and test changes that have not yet been saved. If you hover over the preview icon, you will see a dropdown with additional preview options:
The next is the reload option, which will reload your website.
NOTE: If you want to keep the changes on the website, make sure to save them since the reload option will reset your website to the latest saved version.
The save icon (Ctrl + S) allows you to save the draft without publishing it. The icon turns orange if changes are made to the website.
NOTE: If your website has already been published, all the saved changes will be pushed directly to the live site.
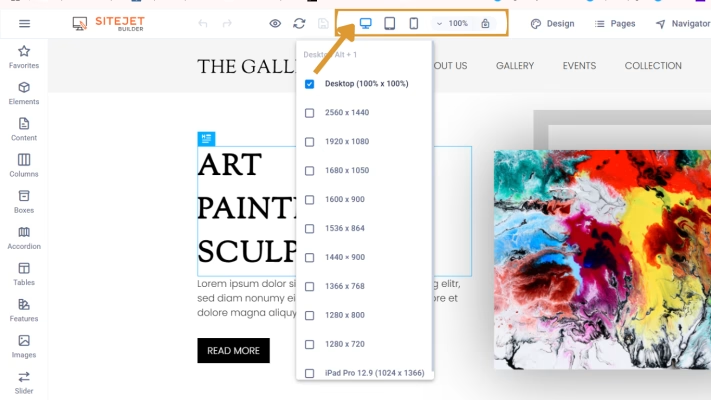
In the middle of the top navigation, you can choose between a desktop, tablet, and mobile view to check your website across all devices and adjust the responsive settings if needed.
Using the percentage dropdown, you can also determine which zoom factor should be used. If you would like to fix the zoom factor, you can do this by clicking on the lock. Otherwise, the zoom will be adjusted depending on the chosen device:
Design, you will find all the global website settings: the color scheme, fonts, button design, and layout that will be applied to each new element. However, you can overwrite those settings on an element or preset level:
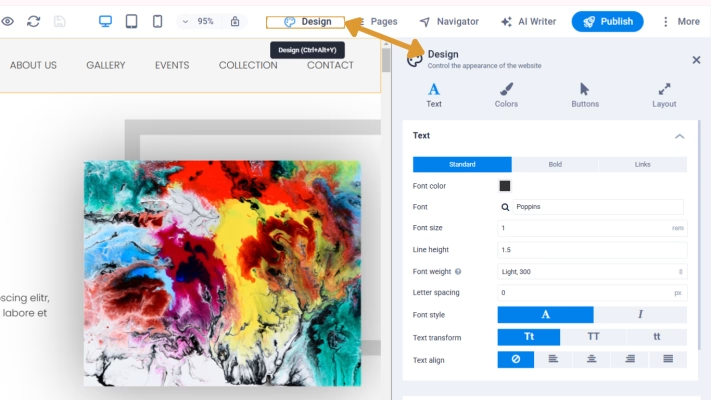
You will see different tabs under “Design” which allow you to site-wide define:
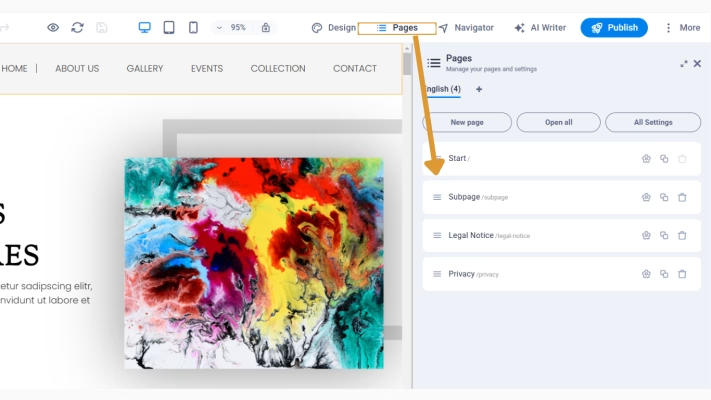
Pages, you will find all the website sub-pages and can navigate through them. You can add new subpages, edit URLs and page names, add site-specific meta information, secure a subpage with a password, and determine if search engines should list a subpage. Each subpage will be opened as a tab above the top navigation:
You can learn more about how to add menus, submenus, favicons, etc. to the pages and manage them here.
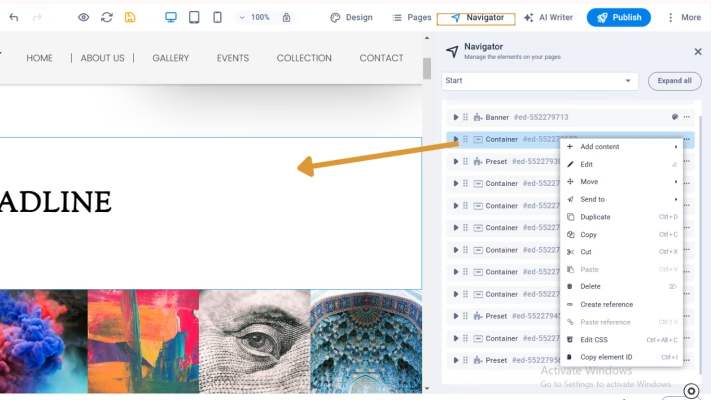
Navigator menu allows you to manage the elements of this or that website page. All the actions available to edit the element can be shown after clicking the three dots on the right of the needed element. By clicking on any position from the list, it will be highlighted in blue and shown on the website:
The AI Writer represents the text generator integrated with ChatGPT in the Sitejet Builder.
The Publish button allows you to save the site and publish it on the Internet. This will redirect you to the domain manager of a website where you can add and manage the domains of your website to publish the website.
NOTE: Only after publishing the website can its files be located in cPanel >> the File Manager menu >> root folder of the domain name in question. No database is created for the website.
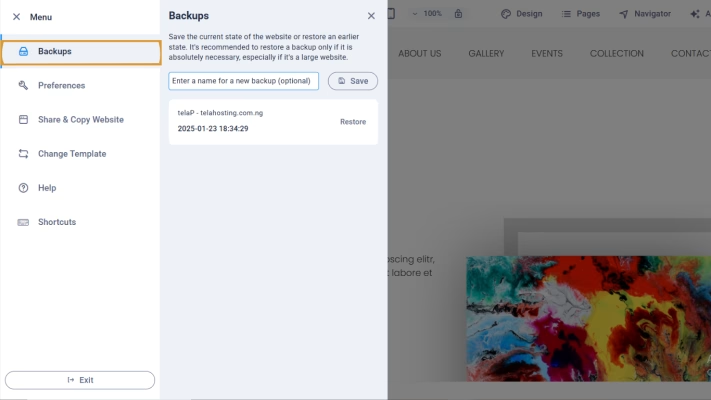
Backups in the Sitejet Website Editor are managed via the Backup Manager tool. They are snapshots of your website at a specific point in time.
An automatic backup is created every 5–10 minutes during an active session.
The Backup Manager saves:
When the maximum of 400 backups has been reached, the oldest version is deleted. Manually created backups are not deleted based on the time intervals, but only if the maximum number of backups has been exceeded.
2. To restore a backup, click on the Restore button. An overlay will open where you can select which components of this backup you want to restore:
You can choose whether you want to restore the website and/or one or more collections:
3. Select the options you want to carry out and click “Okay.”
4. Wait a moment, and do not close the browser tab. The Website Editor will now load the version you have selected.
If you want to save a specific website version, you can create manual backups. To do this, please go to Backups and save the manual backup version:

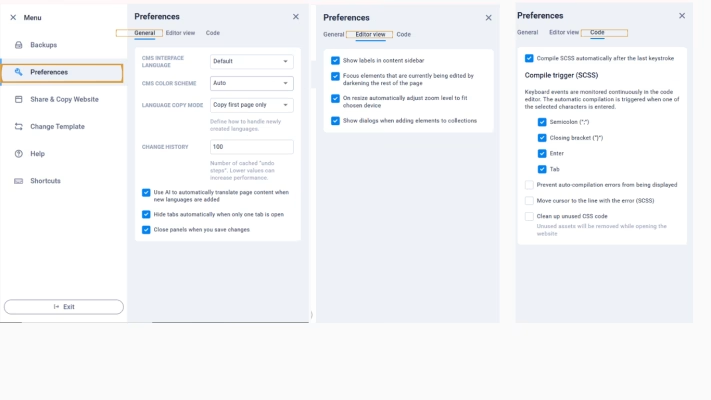
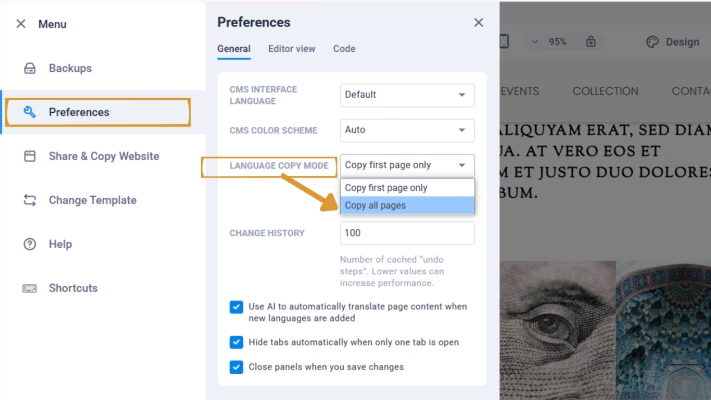
Here, you can set up your preferences in using the website editor (e.g., change the language of the editor, decide if the panels should close when you save the website, or whether only the start page or all subpages should be created when adding a new language):
The menu allows you to copy or share a website with other Sitejet users:
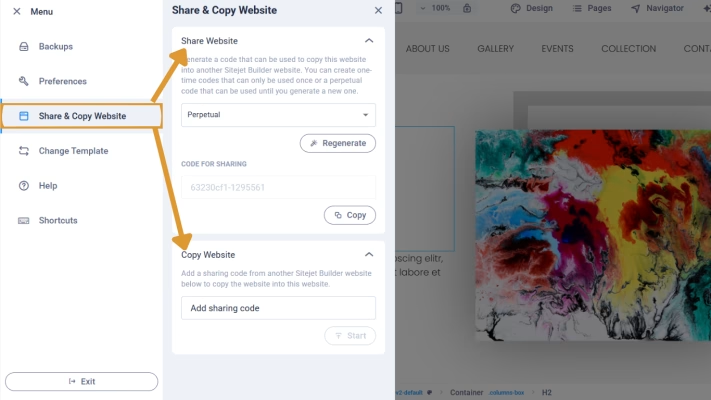
Under Share Website, you can create the code to share it with others so that they can copy the website. There are two options in the drop-down to create the code:
After you select the best code option for you, click Generate and copy the code. Once the recipient receives it, they should paste it into the field for Copy Website to finish the copy process.
Many shortcuts like copy, paste, delete, duplicate, undo, and redo are already second nature to most users. However, there are also shortcuts tailored for working in Sitejet that make building websites convenient and precise. Rearrange contents, create referenced elements, and add new elements in milliseconds or access any important tool panel instantly.
By clicking on the burger menu in the top left corner >> Shortcuts or by pressing [Ctrl] + [K], you can see a list of useful shortcuts that will ease the website creation process in Sitejet.
Footer with breadcrumb, timer, and code editor
In the footer, you will find the breadcrumb which shows you the hierarchy of containers and elements so you get an overview of how different containers, presets, and elements are nested. In other words: within the breadcrumbs, each element and its parent containers are listed together with all CSS classes used:
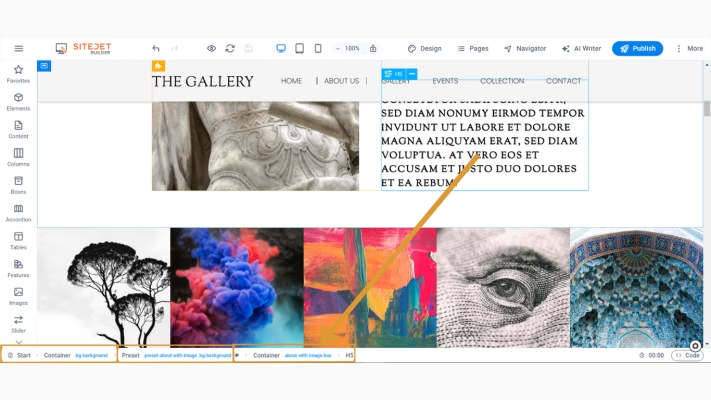
Preset containers show the color palette icon, containers with a background show an image icon, animations are indicated by a star icon, linked elements have a link icon, and elements that are part of a collection show a database icon. To open the settings of the corresponding element, double-click on these symbols or the container name.
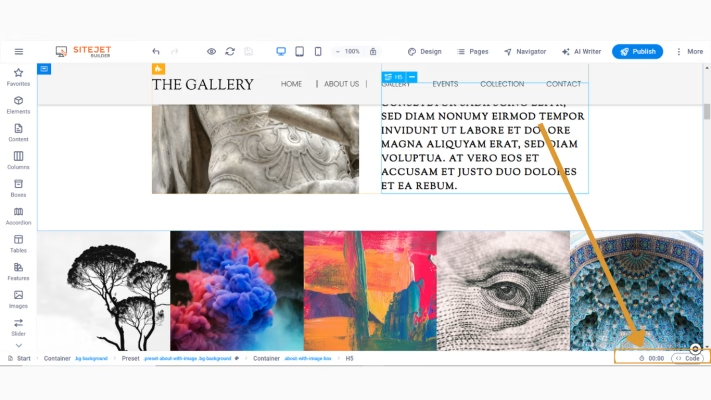
On the right side of the footer, you can see a timer that shows how long you have been in the CMS during this session. With status management and time tracking, you always have an overview of the time spent working on a project.
Next to the timer, you will find the code button, which allows you to access the website’s code, including CSS, JavaScript, and HTML. Here, you can view or edit the project code, including code for presets, or write your own code:
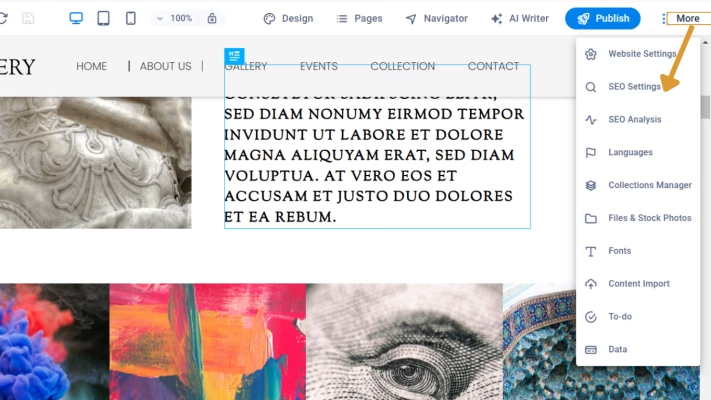
Navigate to the More menu on the right side of the top navigation to find more helpful website features to edit:
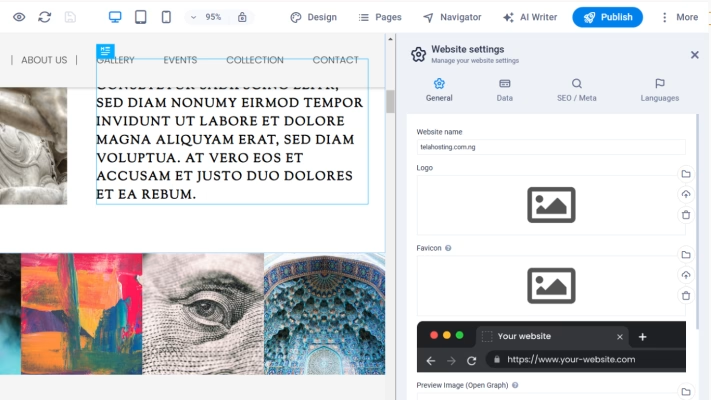
Website Settings
From the Website Settings menu, you can edit the website name, change the logo globally for the website, add a favicon, and preview the image of the website that will be shared on social networks:
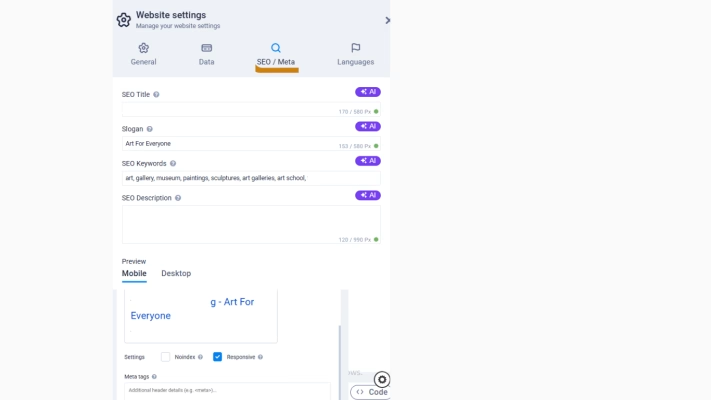
SEO Settings
The menu can be located in two ways:
More >>SEO Settings
More >> Website settings >> SEO/Meta.
It allows you to:
If you would like to know more about what each parameter means, please refer to the corresponding Sitejet document with a detailed explanation.
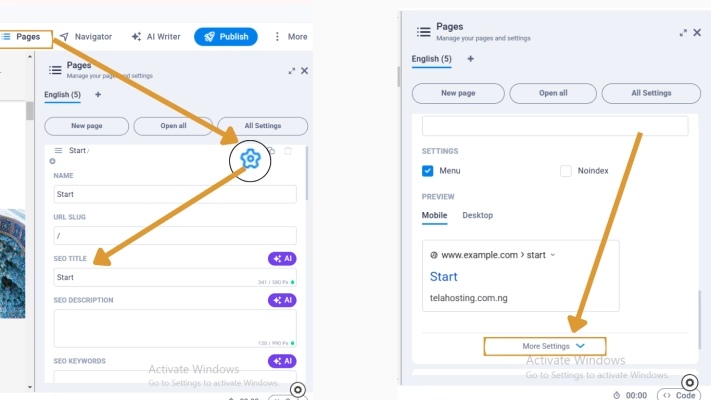
There is also an option to add SEO-relevant information per page. To do it, click on Pages in the top navigation of the Website Editor >> the cog icon of the page you want to edit. Here you will find options like SEO title, description, and keywords:
For advanced settings like adding meta tags or a preview image for that page, click on More Settings:
For more tips and tools, we recommend checking the common questions about search engine optimization here.
SEO Analytics
The menu allows you to run a simple SEO analysis once a week.
To have more continuous and extensive SEO analysis or other useful features like keyword research, site audits, and rank tracker, you need to buy a corresponding subscription from the service that provides the possibility to run SEO analyses integrated into the Sitejet Website Builder.
Languages
The menu can be located in two ways:
More >> Languages;
More >> Website Settings >>Languages.
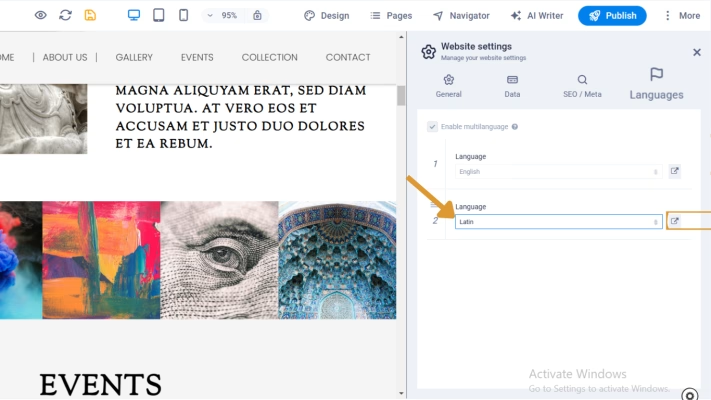
With the help of this menu, you can select the default website language and add a new one. To activate multilanguage, you need to select “Enable multilanguage”:

NOTE: If you want to deactivate multilanguage for a website, you can do it from the very same page. Delete all other languages so that there is only one language available. Then you can select “Deactivate multilanguage”.
After you have activated multilanguage, you will see that the current default language is already listed. It is greyed out because it cannot be removed or changed. Hover over it, and a “+” symbol will appear on the left side. Click it to add another language to the project. You can select the desired language from a drop-down list of languages or just write it down in the line:
Remember to save the changes using the save icon in the menu bar in the upper left corner of the Website Builder (CMS) or use the key combination [Ctrl] + [S] to save the project.
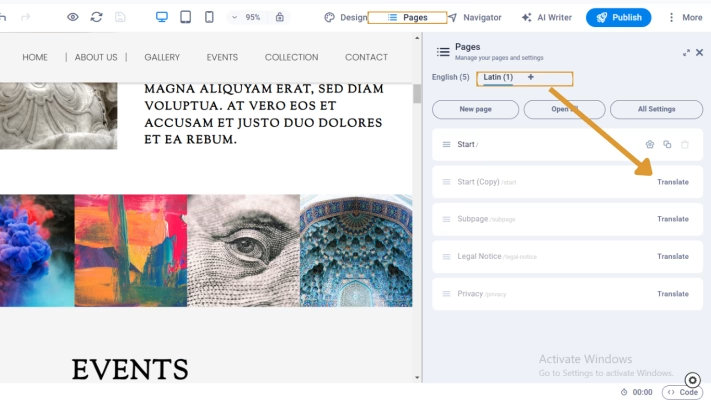
After the changes are saved, Sitejet duplicates all previously created pages in the background and stores the necessary language information accordingly. To see how it is reflected, click the link button to the right of the language:
You’ll be redirected to the Pages menu. In the upper part of the view, you now have tabs to switch between the languages. After adding a new language, only the start page is activated, because there must always be a start page. The other pages can also be created by clicking on “Translate”:
If you want all subpages to be created by default when adding a new language, you can change this setting in the burger menu in the top left corner >> Preferences >> changing the “Language copy mode” to ” Copy all pages”:
NOTE: Please note that changes to pages made in one language do not affect the structure of the pages in other languages.
You can also modify the SEO settings and other details separately for each page of each language, as described in the Sitejet articles on SEO and navigation.
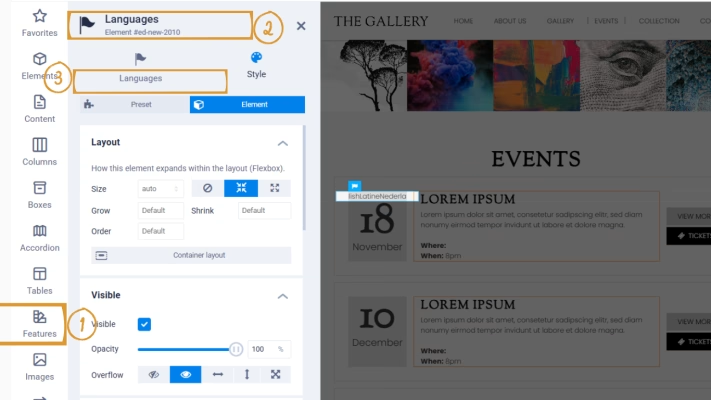
If you want to allow website visitors to select the language on their own, this can be done by adding the “Languages” preset to your site:
The Collections feature is useful when you wish to display several items of the same type on your website. It allows you to create templates for subpages with the same structure. Popular examples include blogs, job postings, real estate listings, directories, and simple news.
When you open the corresponding menu, on the left side of the panel, you will find the list overview of all the collections created for your site. Through the “+” icon, you can add another collection:
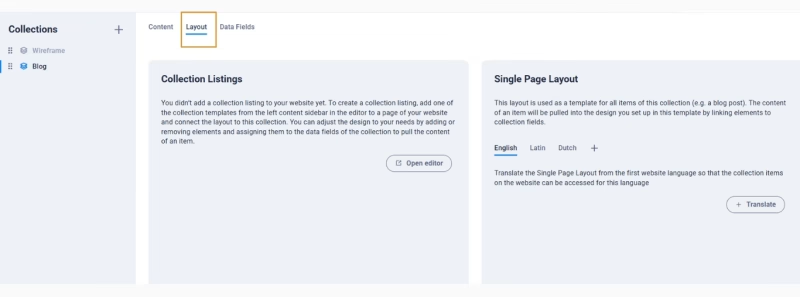
You can manage the collection by clicking on it. Besides the Content section, you will also find the Layout and the Data Fields.
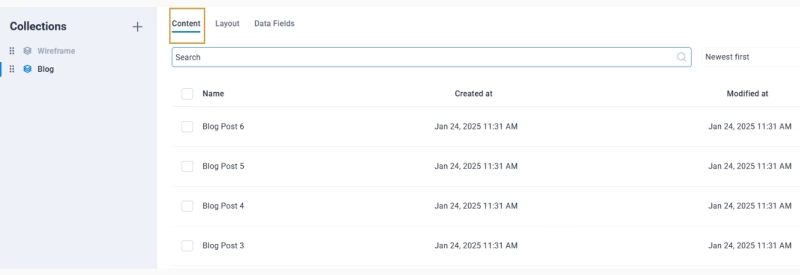
Under Content, you will find a list of all the collection entries you have in this collection. If you use a template or a website that already has a collection, you will find a list of sample entries here:
Under Layout, you will find an overview of all the places on your website where the Collection is included. Also, you have access to the individual page layout, in which you can define how the individual collection entry should look:
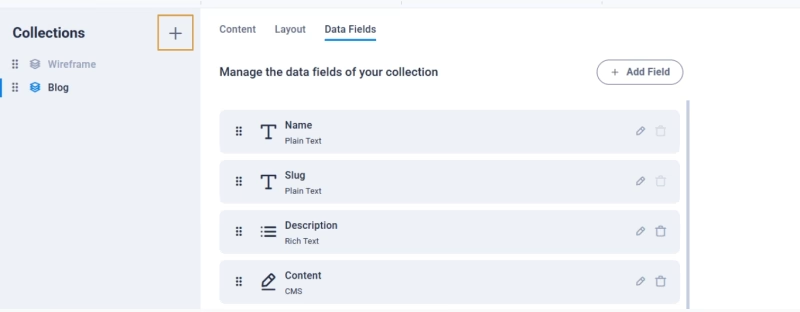
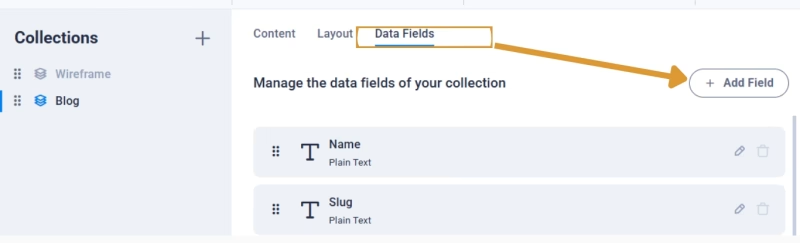
Under Data Fields, you will find the individual fields that you want to use in your collection entry. By default, your entries “only” contain the two fields “Name” and “Slug”, but you can add more fields:
More information about managing Collections inside Sitejet Website Builder can be found here.
Files & Stock Photos
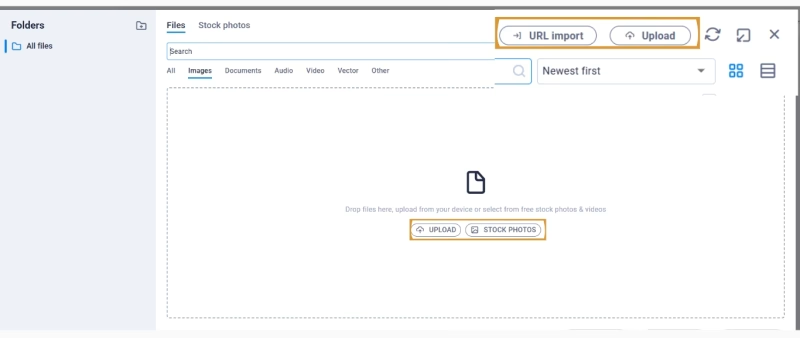
The Files & Stockphotos menu is used to upload and manage images, files, and other content needed for the website. It loads on the right side and you can maximize the overlay to have a better overview:
To add additional files, drag and drop them into the uploader or select the URL Import tab and specify the URL of the media asset you want to import:
NOTE: The upload file size limit is 256 MB. Please note that larger file sizes might take longer to upload.
NOTE: There is no limit to the number of files you can upload per website.
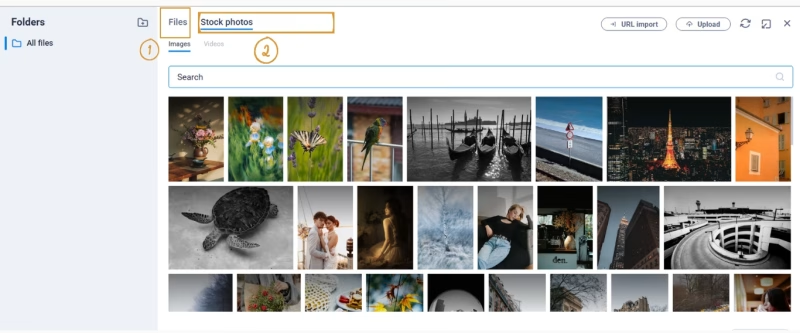
All the uploaded files will be listed under the “Files” section (1). From the “Stock Photos” section (2), you can see a free library of pictures and videos that can be used for your websites. To look for the needed file, use the “Search” field:
More information about managing images and videos in Sitejet can be found here.
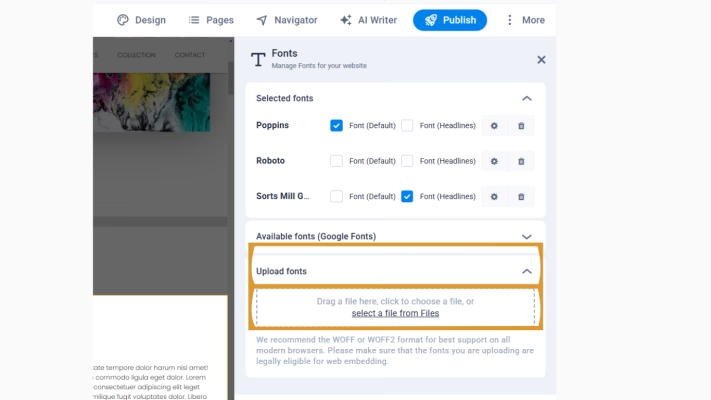
Fonts
Sitejet offers many different fonts you can easily add to your project and use. To add a font to your website, open the font manager in the builder:
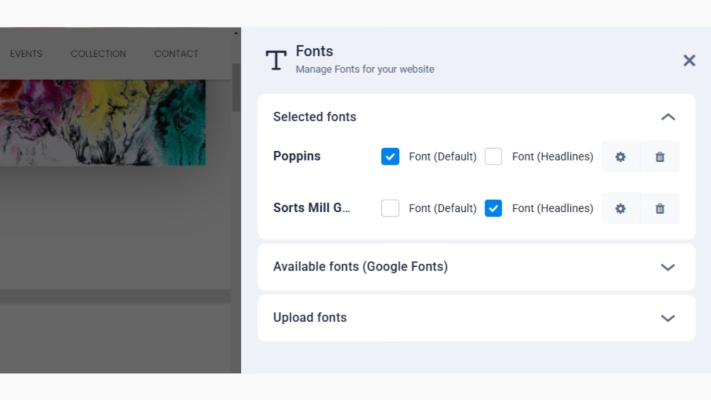
The fonts already assigned to your project are listed under the “Selected fonts” line. Many additional fonts you can preview with the help of sample text by clicking “Available fonts”.
You can change the sample text directly in the font manager to quickly and easily see how your desired text would look with this font. To do this, click on the sample text (step 1 from the screenshot below) and enter your desired text. If you want to preview the new sample text for all fonts, you can click on the button labeled “Copy text to all previews” (2):
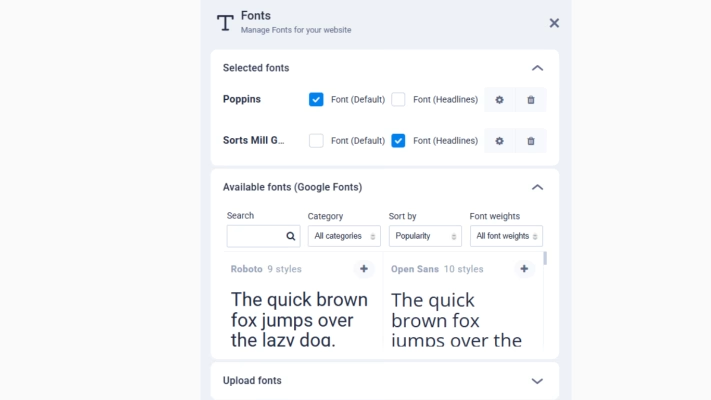
Once you have chosen a font, click the plus symbol on the right to add it to your project.
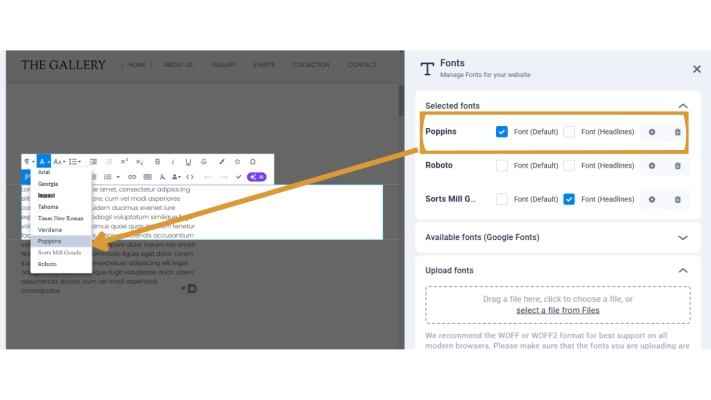
The selected font will now be displayed under “Selected fonts.” You can set default fonts for normal text (Default) and/or for the headlines (Headlines) by checking the respective boxes. You can customize fonts added to your project by clicking the settings icon. This will open further options for the appearance of the selected fonts:
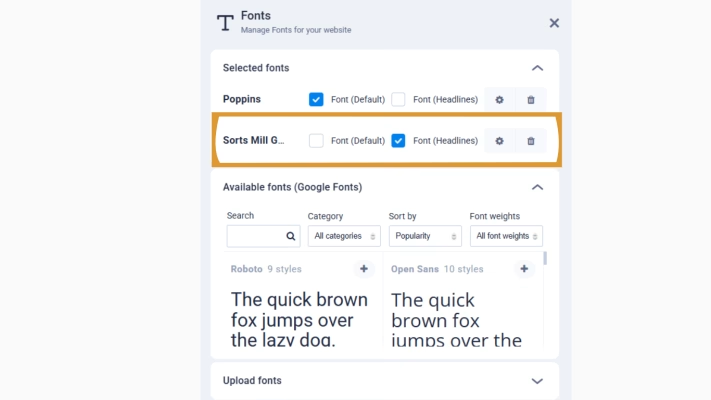
NOTE: Fonts must be added individually to the project. We recommend you remove unused fonts from the project by clicking the garbage can icon on the right side of the font.
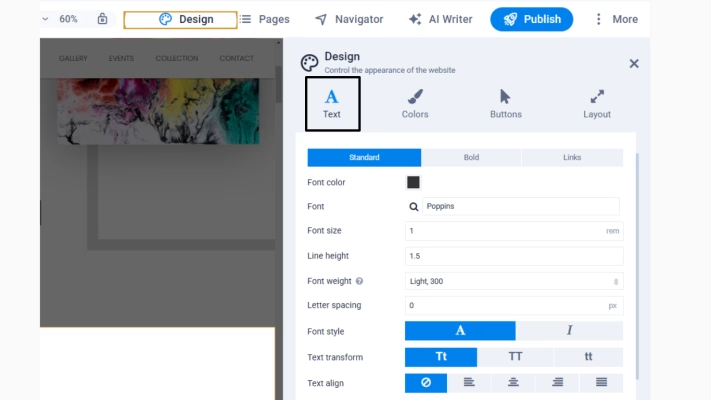
The detailed settings available for each font can be accessed from the Design menu in the top navigation >> under the Text tab. Here, you can adjust font options for texts and headlines:
If you want to use a font not listed under “Available fonts,” you can upload your own by clicking “Upload Fonts” and picking the file from the media manager or uploading the file from your computer:
Once you’ve added fonts to your website, they are available in all elements that display text. In the edit mode of the text box, you can select a font from the drop-down which appears after clicking on the “A” icon:
The import tool allows you to import texts, images, and files from any accessible online page and make them available directly for your project or in media management. Even the HTML tags will be imported.
NOTE: The complete layout and design won’t be imported and “translated” into presets and elements. After the import, some corrections may be needed.
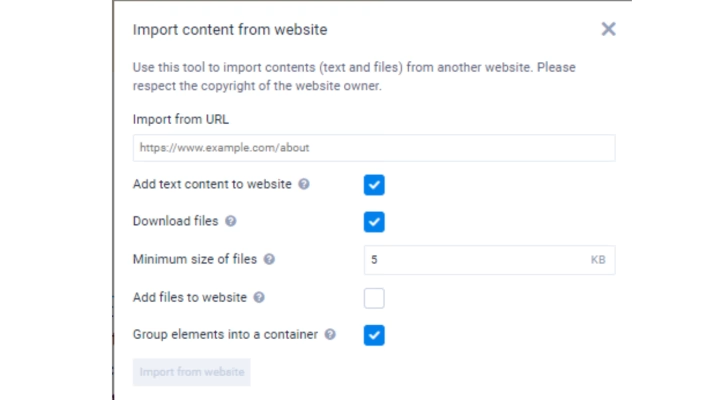
After opening the Content Import menu, in the pop-up window, you can specify the URL from which you want to use the data, as well as configure the following options:
NOTE: The import function does not currently support dynamically generated pages created when the page is loaded.
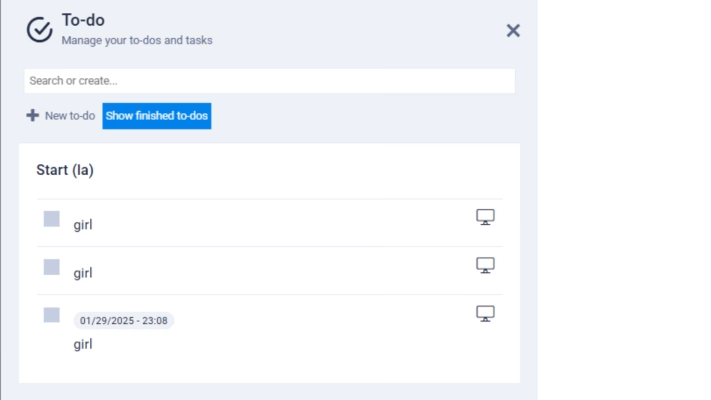
The feature allows you to add global or on-page To-dos or reminders. This simplifies the audit and feedback process with your team e.g. if you check each other’s websites. To add a new to-do, click “+ New to-do”. Then select an element where you want to place your comment and the deadline to process it. Once you click “Create” it will be added to the panel on the right:
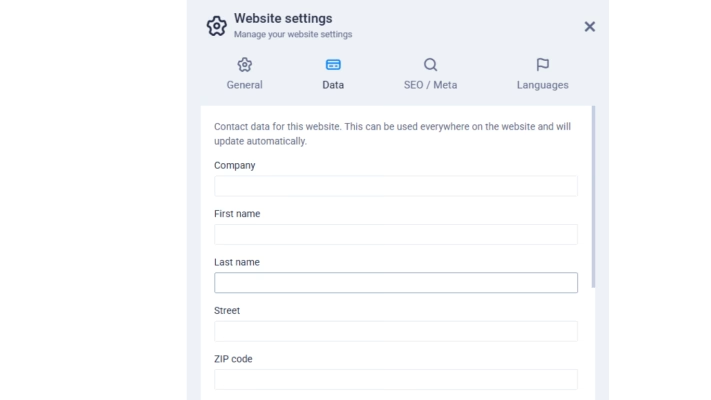
Data
Contact data is global information that can be used to add and update relevant contact information on the whole website from one place. You can access the contact data in the CMS and the Website Manager in two ways:
More >> Data;
More >> Website Settings >> Data.
From there, you can add the company name, address, email address, phone number, and custom data. Once you update any detail here, it will be synchronized automatically on the website globally:
The contact data can be used on your website. Data bindings can easily be used in any text or heading element. Select what you want from the list of possible data bindings in edit mode and click on the user icon:
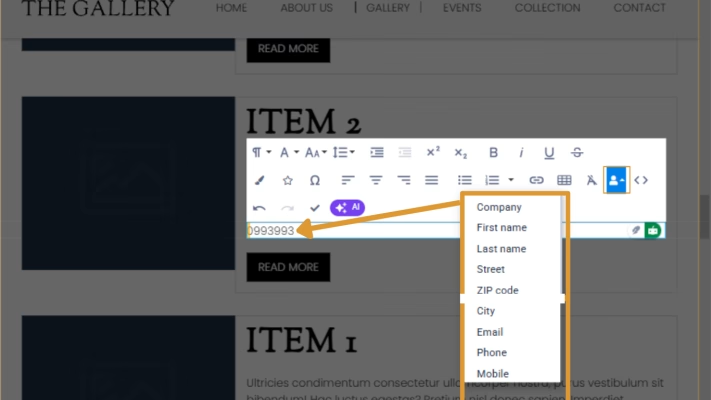
Once you have inserted a data binding or clicked on the corresponding text, it will be marked with an orange frame. This makes it easier and faster for you to see what is normal text and what is data binding. Data bindings cannot be edited because they represent specific customer information from the customer data.
Email addresses inserted via data bindings on a website are automatically linked so that a click on the email address opens the default email software of a website visitor’s device.
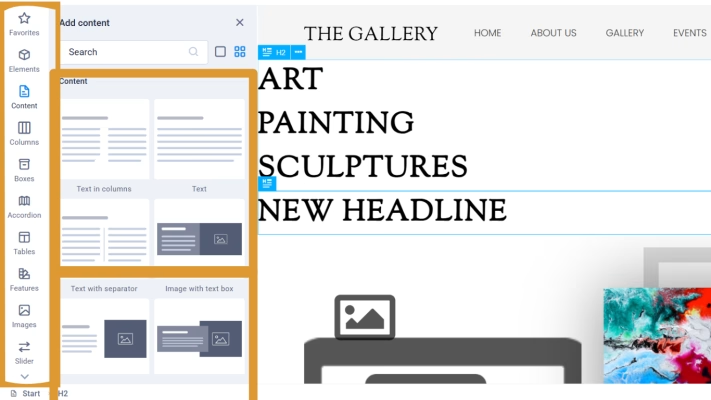
The content sidebar on the left is segmented into different categories that ease adding new content to your website. There, we distinguish between components like headlines, texts, images, and presets which are pre-built website sections and consist of different elements.
Elements are displayed with icons (examples are in the red box) and presets (orange box) are displayed with thumbnails that give you a preview of the website section:
Elements – Provide individual objects with which you can build websites, such as icons, sliders, or the like. They are the “smallest unit” in the website editor, like building blocks, and are used to provide basic functions like texts, headlines, buttons, etc.
Presents – Are pre-built website sections that consist of different elements with pre-defined style options:
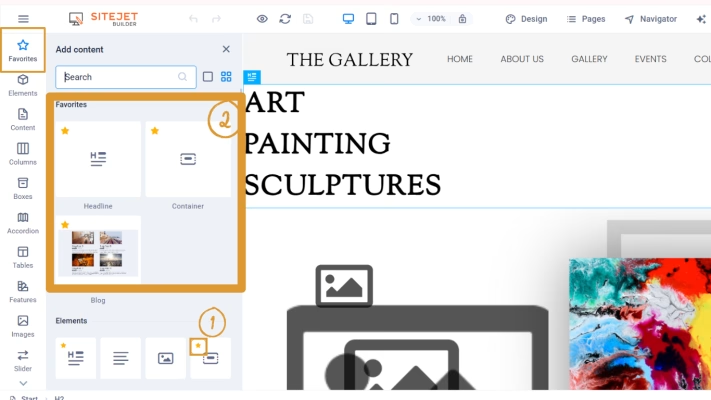
There is an option to mark an element with a star to save it (1). All the selected elements will be located in the Favourite section (2):
Add elements
To add elements to your website, select the category of the file you want to add. Next to the content sidebar, the “Add content” panel will appear. Here you can select your desired element and place it to the preferred position on the website by using drag and drop. A green line will indicate where the element will be added:
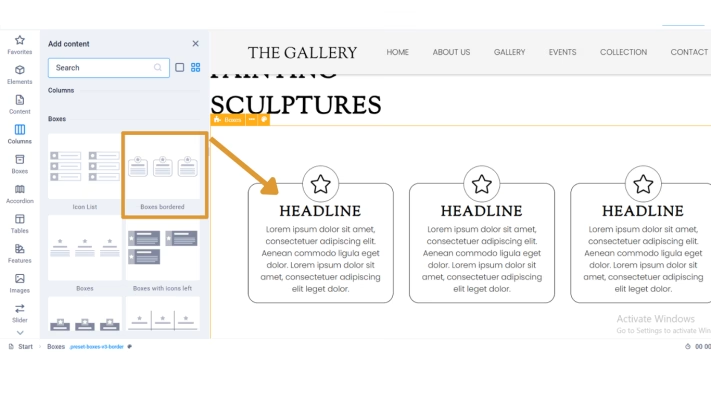
If you selected an element in the website, you can add an element from the panel with one simple left-click on your mouse. If you want to add multiple elements at once, press the Ctrl key while selecting all elements. If you drag and drop them into the website, they will be added in the same order as you click on them.
Edit elements
To edit elements, double-click on them with the left mouse button or press “Enter” if it is already selected.
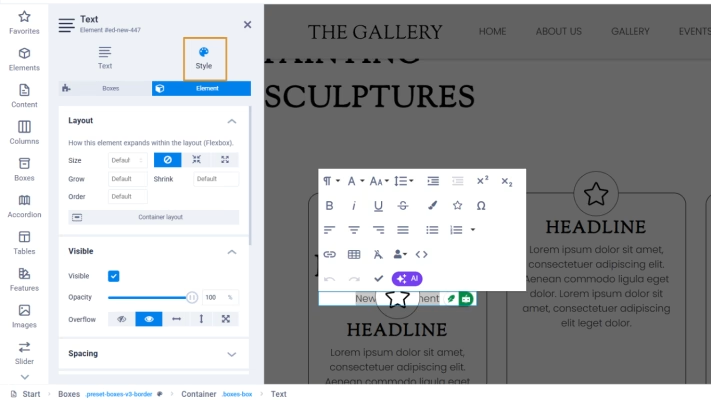
When you double-click on an element, you can edit the element’s content and adjust its settings. Each element has its tab, which will be displayed on the left, indicated by its name, where you can make element-specific adjustments. All elements also have a “Style” tab where you will find universal settings for all the elements:
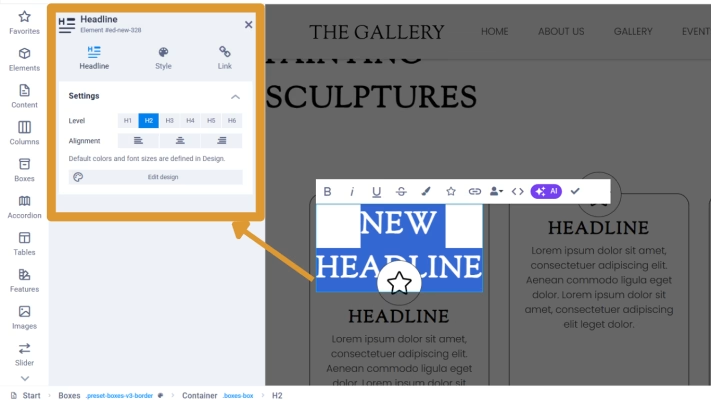
In the “Style” tab, you can set basic design preferences. These settings are the same for all elements. In addition, the Style tab allows you to switch to the preset settings if the element is located in a preset container:
More detailed instructions on how to edit elements in Sitejet can be found here.
Using presets makes website building a breeze. For example, the “Gallery” preset lets you choose between several pre-built variants to give your gallery a stunning look that fits your style. Variants are sets of options for a preset. You can customize the preset to your needs by using the settings below:
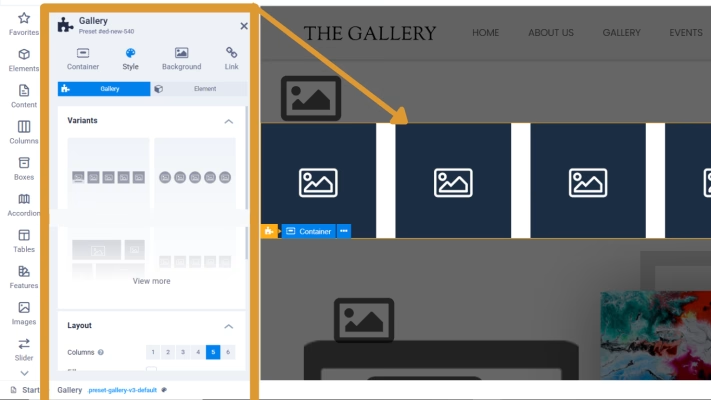
As in the element settings, you can also change the design settings in the preset settings so that it changes according to the device being displayed on and its display size. For example, margins or font size can be adjusted specifically for desktop, tablet, and/or smartphones, so that you have full control over the design of your website on the respective devices at all times.
In order to make it easier to identify which settings apply to specific viewports, the color of the setting labels is adjusted depending on the device. Detailed instructions on how to adjust settings based on the device can be found
To learn more about presents, check this article.
To add a form to your website, click on the category Forms on the left sidebar. This will open the content panel that shows you all form presets (marked in orange), which are fully functional contact forms that consist of different form elements. Below the presets, you can see all individual form elements (in blue). You can add more form elements to form presets to customize them to your needs:
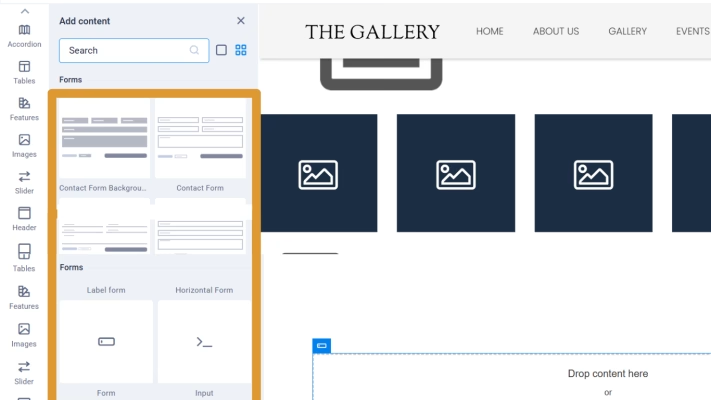
Once you have dragged the preset onto the website, a fully functional contact form will be available. As always, you can use the settings panel on the left side to adjust the form to your needs:
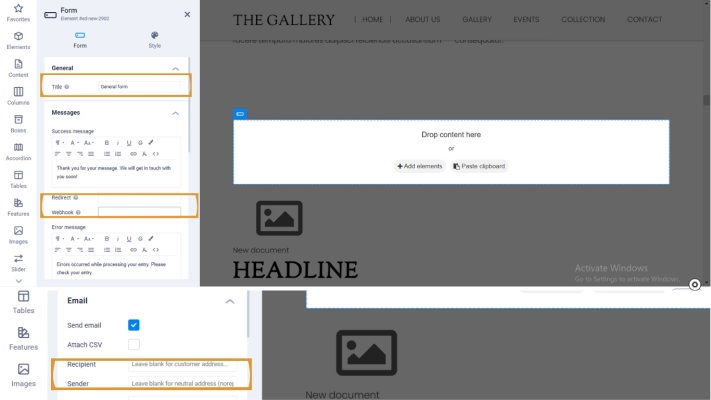
Use the “Title” field to enter a meaningful name.
The “Redirect” and “Webhook” fields play a role after a form is submitted: In the “Redirect” field, you enter the URL or slug of the subpage to which you want to forward the website visitors after successfully submitting their entries. These are usually “thank you” pages or the like, which are used with the help of “pixels,” for example, to track website visitor behavior more accurately. You can read more about pixels in the article on inserting custom HTML, CSS, and JavaScript code. In addition, the input can be forwarded to external tools such as CRM systems via a webhook URL as soon as a website visitor submits the form. See the section on webhooks for more information.
In the form settings, you also define the recipient’s email address, the sender’s email address, and the subject. This can be useful, for example, for automatic email filters to sort form entries into specific folders.
Please refer to this article to check more detailed instructions on how to manage forms inside Sitejet Website Builder.
While trying to create a Sitejet website from cPanel >> Home >> Domains >> Sitejet Builder, you may see a domain that does not allow its creation. The following issues may be impacting your ability to create a website with Sitejet:
1. Shared document root
You cannot use a shared document root directory with Sitejet. To resolve this issue, do one of the following:
Use the main domain of your hosting account.
Create a new domain.
Delete the second dependent domain.
2. Redirected website
A redirect allows you to redirect one domain to another domain, either for a website or a specific web page. However, it’s impossible to use a redirected website with Sitejet. To resolve this issue, perform the following steps:
Navigate to the Redirects menu in cPanel (cPanel » Home » Domains » Redirects).
Under “Current Redirects”, locate the desired redirected domain and click “Delete”. A confirmation box will appear.
Click “Remove Redirect”. A success message will appear.
You can now create a Sitejet website for that domain.
You can move a website you created with Sitejet to another domain. To move the files from a Sitejet website domain’s document root to another domain’s document root, please follow the steps listed below:
Copy your Sitejet-provided sharing code, a unique 15-digit key you can obtain in the Sitejet Website Builder (CMS). It resembles the following: 263e457a-407129.
To get your Sitejet-provided code, perform the following steps:
Go to cPanel >> Home >> Domains >> Sitejet Builder, locate the domain you would like to move to and click “Edit Site”
Inside Sitejet Website Builder (CMS), click the hamburger menu on the left side of the top navigation bar.
Click “Share & Copy Website”.
In the “Code for Sharing” section, click the “Copy” button to copy the Sitejet-provided code.
Click “Exit” to return to cPanel’s Sitejet Builder interface.
Once you have your Sitejet-provided code, you must share it with your new Sitejet domain:
In cPanel >> Home >> Domains >> Sitejet Builder locate the domain to which you would like to move your files. Click one of the following options: “Edit Site”, “Continue Editing,” or “Try Sitejet.”
NOTE: The options will vary depending on the target domain. If your target domain is not a Sitejet website, you must select any template as a placeholder before the system will redirect to the Sitejet Website Builder (CMS).
Inside Sitejet Website Builder (CMS), click the hamburger menu on the left side of the top navigation bar to return to the “Share & Copy Website” interface.
In the “Copy Website” section, paste the Sitejet-provided sharing code in the “Add sharing code” text box.
Click “Start”. The system will move your files to this domain’s document root.
Click “Publish” in the Sitejet Website Builder (CMS) to publish the website to the new domain.
With this, you can successfully build a website with our telaHosting AI builder powered by sitejet. Happy Hosting🌟


Need help? Our friendly support team is always here for you! Reach out below.
Happy hosting! 🌟