A subdomain allows you to create a separate section of your website with its own unique address. For example, if your main domain isexample.com, a subdomain could be blog.example.com or store.example.com. Follow this step-by-step guide to create a subdomain on telaHosting.
Step 1: Log in to Your telaHosting Account
- Visit www.telahosting.com and log in with your username and password.
- Once logged in, go to your Dashboard.
Step 2: Access Your cPanel
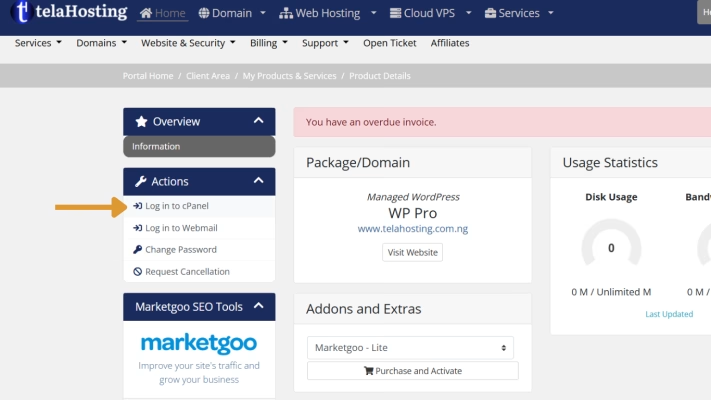
- In your telaHosting dashboard, locate your hosting plan.
- Click on Log in to cPanel to open the cPanel interface.

Step 3: Open the Subdomains Tool
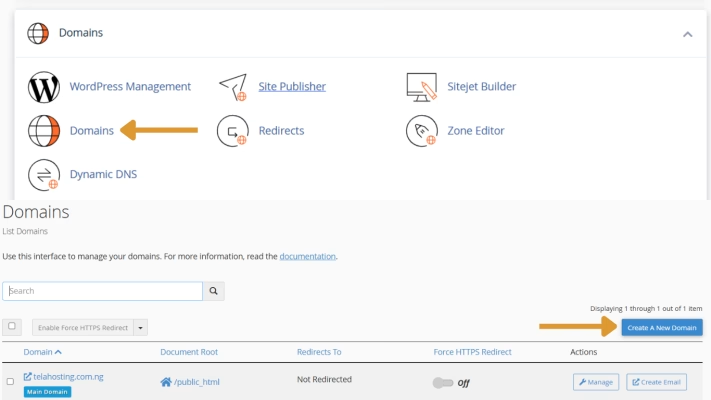
- In the cPanel interface, scroll down to the Domains section.
- Click on domains.
- Then click on Create a new Domain

Step 4: Create a New Subdomain
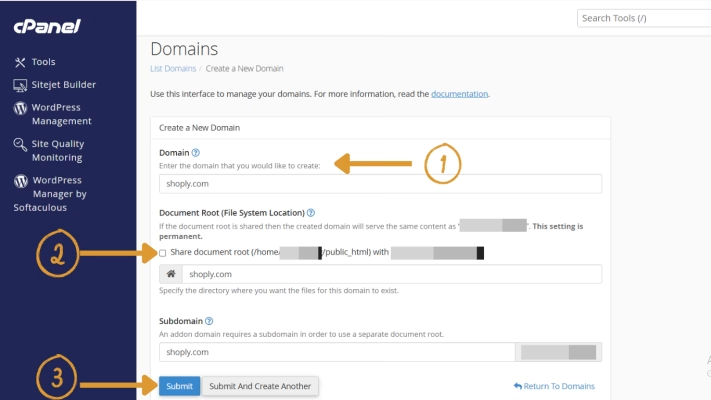
In the Subdomains page, fill out the form:
- Enter the name of your subdomain (e.g.,
blog, store, or support).
- Uncheck the “Share document root (/home/username/public_html) with “domain.tld”.”option and enter the directory where you want the files for this subdomain to exist, or you can leave it as it is.
- Then click on submit.

Step 5: Verify Your Subdomain
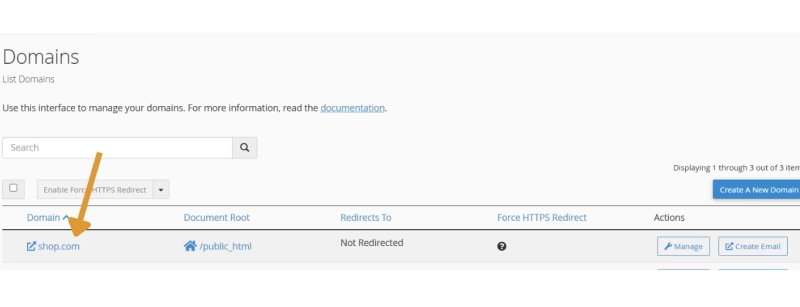
- After the subdomain is created, you’ll see a success message.
- Test the subdomain by entering it into your browser (e.g.,
blog.example.com).
If everything is set up correctly, you’ll see a default page or the contents of the subdomain’s document root. Step 6: Add Content to Your Subdomain
- Use the File Manager in cPanel to upload files to the subdomain’s document root (e.g.,
public_html/blog).
- Alternatively, install a CMS like WordPress on the subdomain using Softaculous Apps Installer.
Pro Tip: Treat your subdomain as a mini website. It can have its own files, databases, and design.


 Step 6: Add Content to Your Subdomain
Need help? Our friendly support team is always here for you! Reach out below.
Happy hosting! 🌟