
Welcome to telaHosting! cPanel is your ultimate tool for managing your website efficiently. With its user-friendly interface, you can handle everything from files to databases with ease.
This guide will walk you through the basics of using telaHosting’s cPanel for website management.
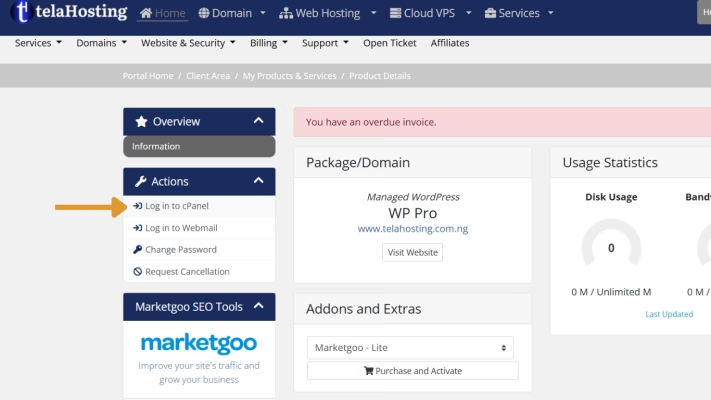
Step 1: Log in to Your cPanel
- Visit the telaHosting website and log in to your account.
- Use the login details sent to your email with the title New Account Information when you purchase a new hosting plan to login directly to your cPanel with the links provided. OR
- Go to your client area and click on Log in cPanel under your hosting plan.
Once logged in, you’ll see the cPanel dashboard, filled with tools organized into categories like Files, Databases, and Domains.
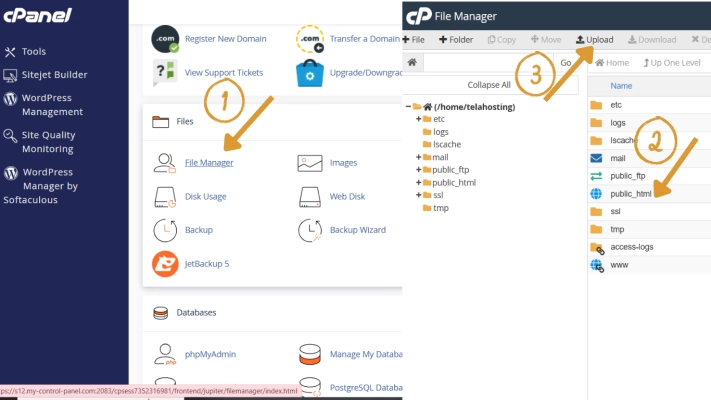
Step 2: Manage Your Files
-
- In the Files section, click on File Manager.
- Navigate to your website’s root directory (often called
public_html).
- Use options like Upload, Download, or Edit to manage your website files.
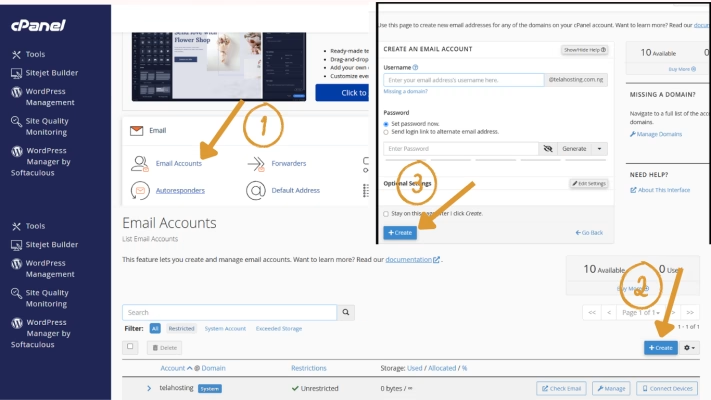
Step 3: Create and Manage Email Accounts
- Go to the Email section and select Email Accounts.
- Click Create to set up a new email address (e.g., [email protected]).
- Enter the desired username, password, and storage limit, then click Create Account.
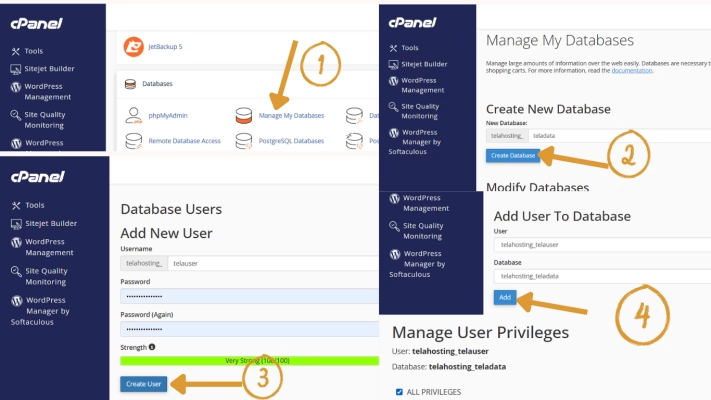
Step 4: Manage Databases
- In the Databases section, click on MySQL Databases.
- Create a new database by entering a name and clicking Create Database.
- Add a database user by filling out the username and password fields.
- Link the user to the database and assign the necessary privileges.
Step 5: Install Applications with Softaculous
- Locate the Softaculous Apps Installer in the Software section.
- Click on the app you want to install (e.g., WordPress, Joomla). You can use how to install WordPress with Softaculous to successfully install them.
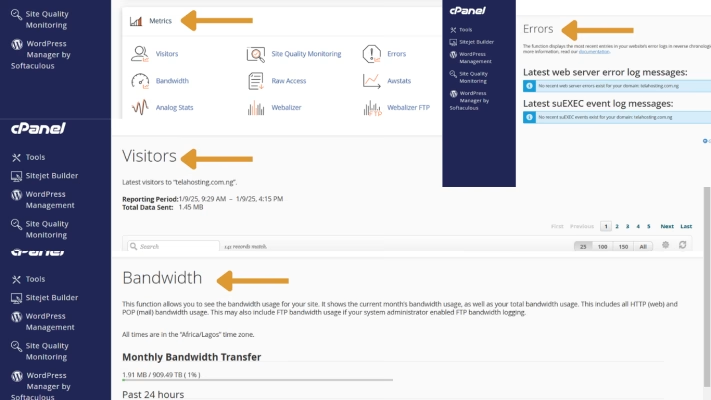
Step 6: Monitor Your Website’s Performance
- Go to the Metrics section.
- Use tools like Visitors, Bandwidth, and Error Logs to monitor traffic and troubleshoot issues.
Pro Tip: Regularly checking metrics helps you identify potential problems early.
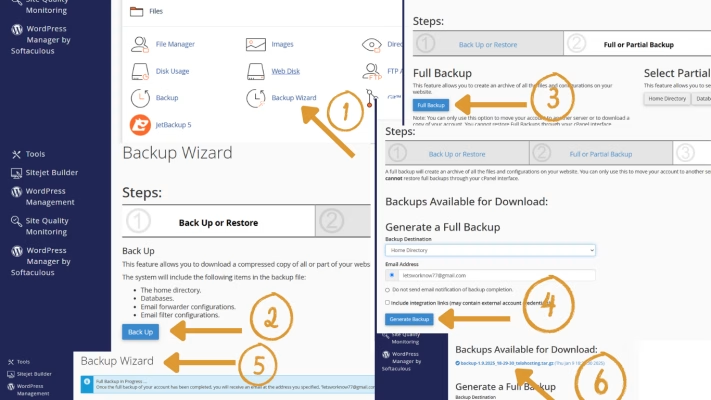
Step 7: Back Up Your Website
- In the Files section, click on Backup Wizard.
- Click Backup.
- Select Full Backup.
- Choose the location of your backup and input an email address in order to get the email when the backup is completed.
- Here the data is backing up.
- when the back up is complete, click on backups available to Download it
- Store the backup in a safe location. And you can find this backup in your File Manager.
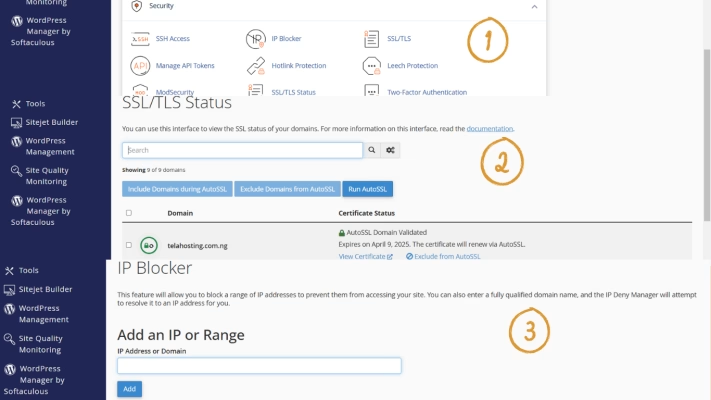
Step 8: Secure Your Website
- Go to the Security section and click on SSL/TLS Status.
- Install an SSL certificate to encrypt your website’s connection.
- Use an IP Blocker to restrict access to unwanted visitors.
Pro Tip: An SSL-secured site builds trust with visitors and boosts SEO.
With telaHosting’s cPanel, managing your website is a breeze. Dive in, explore the tools, and take control of your online presence. Happy hosting! 🌟


Need help? Our friendly support team is always here for you! Reach out below.
Happy hosting! 🌟