One of the most powerful tools inside cPanel is the DNS Zone Editor. This tool lets you manage DNS records like A, CNAME, MX, TXT, and more, all from one place.
What Is the DNS Zone Editor in cPanel?
The DNS Zone Editor is where you manage your domain’s DNS (Domain Name System) records. These records tell the internet where to find your website, where to deliver your emails, and how to connect different services to your domain.
Why You Might Need to Use the DNS Zone Editor
You might want to access the DNS Zone Editor if you need to:
- Connect your domain to another web service (like Google Workspace or Microsoft 365).
- Set up or update your website’s IP address (using an A record).
- Configure custom subdomains (like blog.yourdomain.com).
- Add a TXT record for domain verification or email security (SPF, DKIM, or DMARC).
- Change MX records to route emails through your preferred mail server.
How to Access DNS Zone Editor in cPanel
Follow these easy steps to access your DNS Zone Editor in cPanel:
Step 1: Log in to Your cPanel Account
To start, log in to your cPanel account. You can do this through:
- The direct URL provided by us at telaHosting (something like yourdomain.com/cpanel), or
- Through your telaHosting Client Area using your registered email and password then click on “log in to cPanel” next to your hosting account.
Once you are in, you’ll see the cPanel dashboard with several categories like Files, Databases, Domains, and Email.
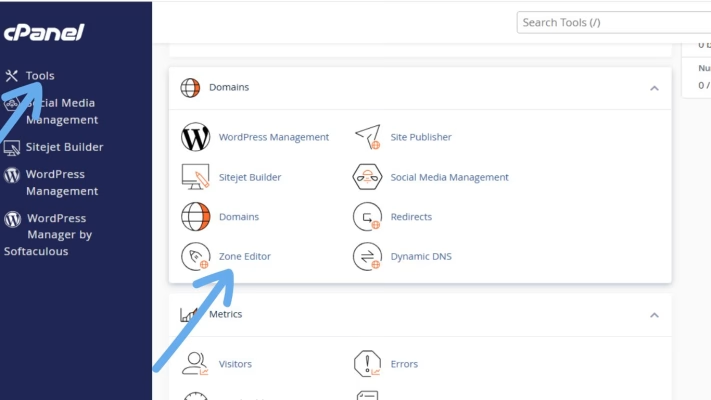
Step 2: Locate the “Domains” Section
Scroll down (or use the search bar at the top) to find the “Domains” section. Under this section, you will see options such as:
- Domains
- Addon Domains
- Redirects
- Zone Editor
Click on “Zone Editor.”
Step 3: Choose the Domain You Want to Manage
If you have multiple domains hosted under your cPanel account, you will see a list of all of them here. Find the domain you want to work with and click “Manage.”

This opens the DNS Zone Editor for that specific domain, giving you access to all its DNS records.
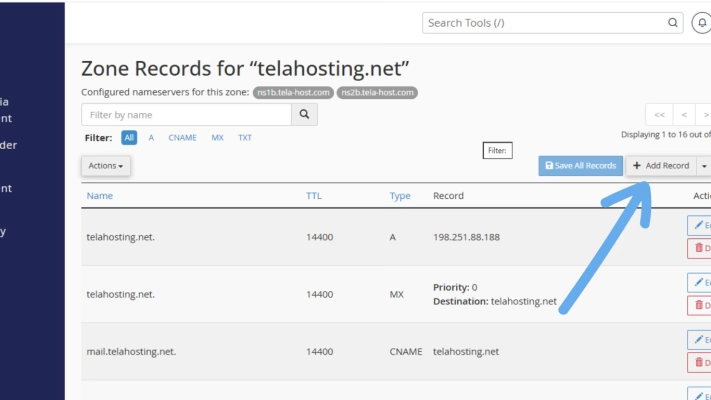
Step 4: View and Manage Your DNS Records
Inside the Zone Editor, you will see a list of DNS records already configured for your domain — including A, CNAME, MX, TXT, and sometimes SRV or AAAA records. From here, you can:
- Add a new record: Click on “+ Add Record” and choose the type (A, CNAME, MX, TXT, etc.).
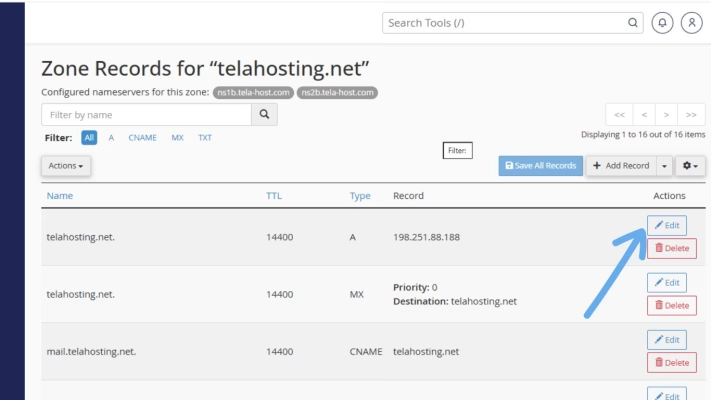
- Edit an existing record: Click Edit next to the record you want to change.
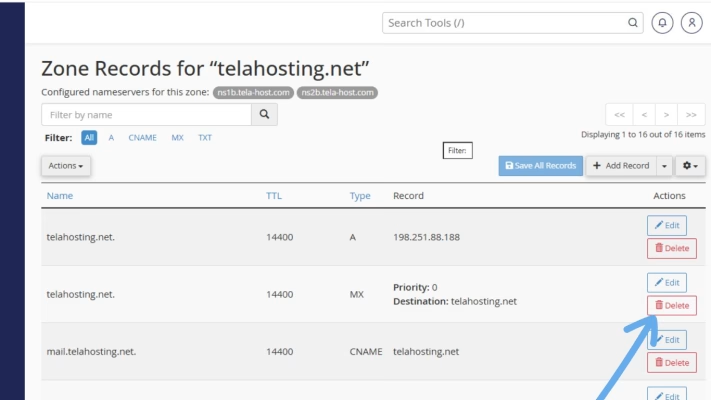
- Delete a record: Click Delete (be careful, removing essential records can cause downtime).
 Each record type serves a unique purpose. For example:
- A Record: Points your domain to your hosting server’s IP address.
- CNAME Record: Redirects one domain to another (useful for subdomains).
- MX Record: Controls email routing.
- TXT Record: Used for verification and security purposes.
Step 5: Save Your Changes
Once you have added or modified a record, don’t forget to save your changes. Keep in mind that DNS updates may take a little time to propagate globally, usually anywhere from a few minutes to 24 hours, depending on your settings.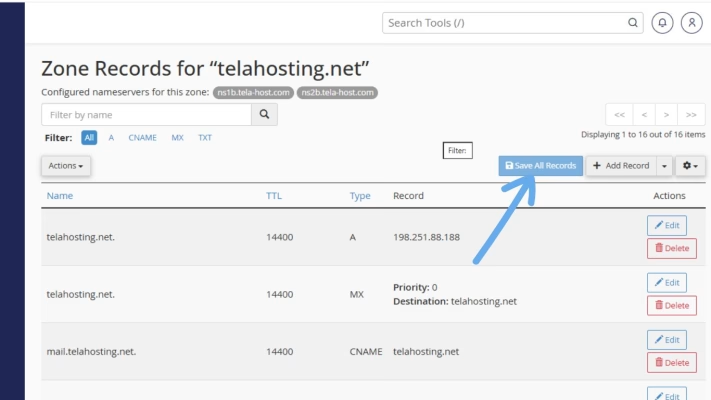
Tips for Managing DNS Safely
Working with DNS records is easy, but one small mistake can affect your website or emails. Here are a few safety tips:
- Double-check before deleting or editing a record: Always make sure you know what a record does before changing it.
- Keep a backup of your DNS records: You can copy and paste them into a document for safekeeping before making changes.
- Understand TTL (Time-To-Live): TTL determines how long servers should store your DNS information before checking for updates. Lower TTL values (like 300 seconds) make changes propagate faster.
- Use our support if unsure: Our support team is always available to help you configure your DNS correctly.
Final Thought
Accessing the DNS Zone Editor in cPanel is not as technical as it might sound. Once you log in and know where to click, it is straightforward and incredibly empowering.
By mastering this simple feature, you take full control of your online presence: managing your domain, ensuring smooth email delivery, and integrating essential services effortlessly.
Need help? Our friendly support team is always here for you! Reach out below.
Happy hosting! 🌟