Connecting your domain to Google Workspace is one of the most important steps you’ll take for your business email. And the best part is that it’s very straightforward once you know where to click.
Why Connect Your Domain to Google Workspace?
If you’re using Google Workspace, you already know the benefits:
- Professional email addresses like [email protected]
- Google’s strong spam protection
- 30GB+ cloud storage
- Access to Google Meet, Docs, Drive, and other business tools
- Enterprise-level deliverability
But before you can enjoy all that, Google needs to know that you own the domain and DNS setup inside DirectAdmin is the key.
What You Need Before Starting
Before connecting your domain, make sure you have:
- An active Google Workspace subscription
- Access to your Google Admin Panel
- Access to DirectAdmin via your telaHosting account
- Your domain name
- Basic details from Google (TXT code, MX records, SPF, DKIM)
Once you have these ready, let’s move on.
STEP 1: Sign into the Google Workspace Admin Console
- Go to admin.google.com
- Log in with your Google Workspace admin email
- Google will ask you to verify your domain
Click the option to “Verify domain”. This takes you to the page where Google provides a TXT verification record.
STEP 2: Copy the Google Workspace TXT Verification Record
Google will display a TXT record that looks like this: google-site-verification=some-long-code-here
Copy this — we’ll use it inside DirectAdmin.
STEP 3: Log Into DirectAdmin via telaHosting
- Open your telaHosting Client Area
- Click your hosting package
- Select “Login to DirectAdmin”
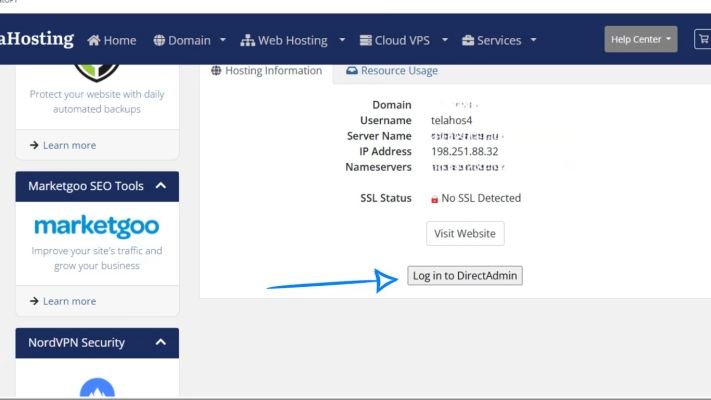
When you land inside the panel, you’re ready for DNS editing.
STEP 4: Go to DNS Management
Inside DirectAdmin:
- Scroll to Account Manager
- Click DNS Management
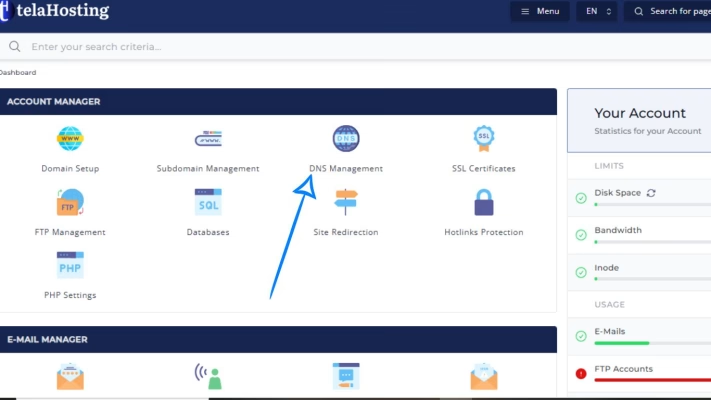
This is where you’ll add, edit, and delete DNS records.
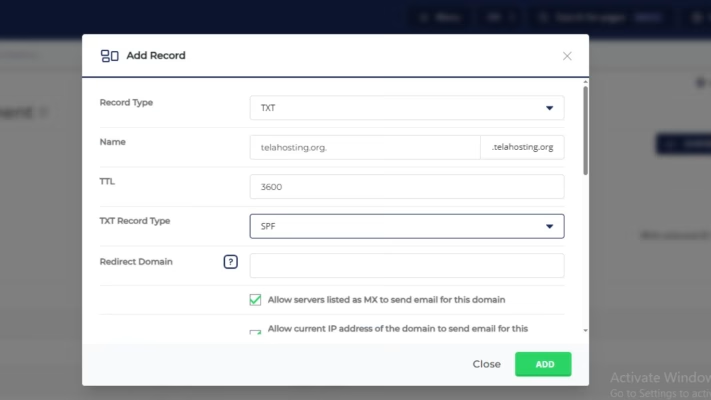
STEP 5: Add the TXT Verification Record
Inside DNS Management:
- Click Add Record
- Select TXT Record
- In the Name field, leave blank or enter your domain
- In the Value field, paste the Google TXT verification line: google-site-verification=your-google-code-here
- Save the record
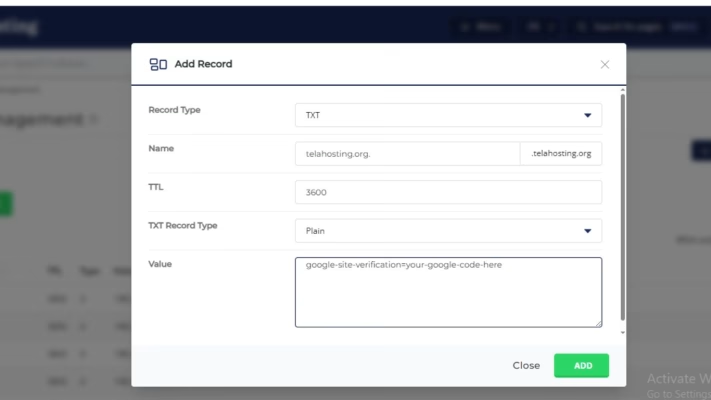
That’s it — verification DNS is added.
STEP 6: Return to Google Admin and Click “Verify”
Google will check your DNS for the TXT record. Since DNS propagation varies, it may take:
- 5–15 minutes and
- Up to 24 hour globally
Once Google detects it, your domain will be marked as verified.
STEP 7: Remove Existing MX Records in DirectAdmin (Important)
Before adding Google’s MX records, you must delete all existing MX records that belong to telaHosting or any other provider.
Inside DNS Management:
- Look for MX records like mail.yourdomain.com
- Select and delete them
- Ensure there are no MX conflicts
Once cleared, we can add Google’s MX.
STEP 8: Add Google Workspace MX Records
Google provides the following MX records:
| Priority | Mail Server |
| 1 | ASPMX.L.GOOGLE.COM |
| 5 | ALT1.ASPMX.L.GOOGLE.COM |
| 5 | ALT2.ASPMX.L.GOOGLE.COM |
| 10 | ALT3.ASPMX.L.GOOGLE.COM |
| 10 | ALT4.ASPMX.L.GOOGLE.COM |
To add them:
- Click Add Record
- Choose MX Record
- Enter the priority (1, 5, or 10)
- Enter the server address
- Save

Repeat until all five MX records are added.
STEP 9: Add SPF Record for Google Workspace
Inside DNS Management:
- Click Add Record
- Choose TXT Record:
- In the Name field: Leave empty or enter your domain.
- In the Value (SPF): v=spf1 include:_spf.google.com ~all
This SPF record tells servers that Google is allowed to send mail for your domain.
STEP 10: Add DKIM (Optional but Highly Recommended)
Once domain verification is complete:
- Go to Google Admin Console
- Search for DKIM
- Click Generate New DKIM Key
- Copy the generated TXT record
- Add it inside DirectAdmin under DNS Management as a TXT Record
This boosts inbox delivery.
STEP 11: Add DMARC (Extra Email Protection)
- Click Add Record
- Choose TXT Record:
- In the Name field: _dmarc
- In the Value field: v=DMARC1; p=none; rua=mailto:[email protected];

Later, you can change “none” to “quarantine” or “reject” for stronger protection.
STEP 12: Update “Local Mail Server” Setting
DirectAdmin has a setting that can break Google Workspace email delivery if left unchanged.
Inside DirectAdmin:
- Go to Email Manager
- Click MX Records
- Turn Local Mail Server → OFF
Because email is now handled by Google, not telaHosting.
STEP 13: Test DNS and Email Delivery
Use these tools:
- DNSChecker.org
- WhatsMyDNS.net
- MXToolbox.com
Once everything shows correctly, Gmail will begin receiving emails through your domain.
Conclusion
Connecting your telaHosting domain to Google Workspace through DirectAdmin is easier than it looks. Once you’ve added the TXT verification record, updated MX records, and configured SPF + DKIM, your domain becomes fully connected to Google’s email platform.
And from that moment, you can enjoy ultra-reliable business email, stronger security, and a professional identity for your brand.
FAQs
1. How long does it take for Google Workspace DNS to activate?
Usually 5–30 minutes, but up to 24 hours globally.
2. Why am I not receiving emails after adding MX records?
You may have forgotten to disable “Local Mail Server” in DirectAdmin.
3. Can I use both telaHosting email and Google Workspace?
No — you must use one email provider at a time.
4. Do I need SPF, DKIM, and DMARC?
Yes. They help your emails deliver correctly and prevent spam.
5. What happens if I added the wrong DNS records?
You can delete and re-add the correct ones without any issues.
Need help? Our friendly support team is always here for you! Reach out below.
Happy hosting! 🌟