Why You Need DNS Records for Microsoft 365 Email
Microsoft 365 requires DNS records so it can:
- Verify your domain ownership
- Receive emails through Exchange Online
- Prevent spam and spoofing (SPF, DKIM, DMARC)
- Enable services like Teams, SharePoint, and Auto-discovery
- Improve email deliverability
Once DNS is set correctly, your Microsoft 365 email will work anywhere — on mobile, desktop, and web.
What You Need Before You Start
Before you begin, make sure you have:
- An active Microsoft 365 subscription
- Your Microsoft 365 Admin login
- Access to your telaHosting DirectAdmin panel
- Your domain name
- The DNS values from Microsoft (you’ll see them in your admin panel)
Now you’re ready.
STEP 1: Log In to Microsoft 365 Admin Center
- Go to admin.microsoft.com
- Log in with your Microsoft 365 admin account
- Go to Settings → Domains
- Add your domain (if you haven’t already)
Microsoft will give you a TXT verification record first.
STEP 2: Copy the TXT Verification Record from Microsoft
The TXT record usually looks like this: MS=ms########
This is used to prove that you own the domain. You’ll need to paste this inside DirectAdmin.
STEP 3: Log In to DirectAdmin
- Go to your telaHosting Client Area
- Select your hosting package
- Click Login to DirectAdmin
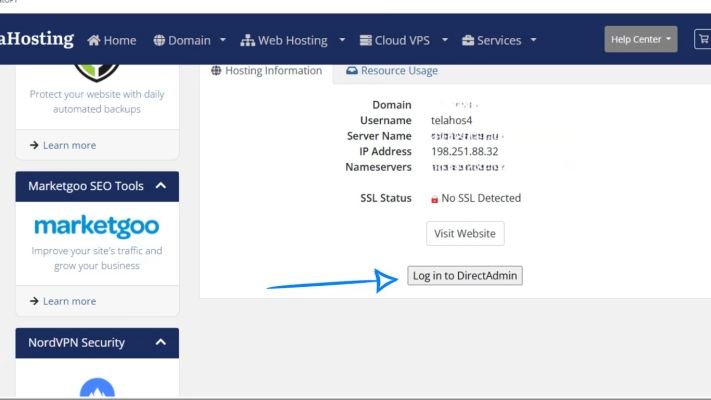
Once inside, we’ll go to the DNS section.
STEP 4: Open DNS Management in DirectAdmin
Inside DirectAdmin:
- Go to Account Manager
- Click DNS Management
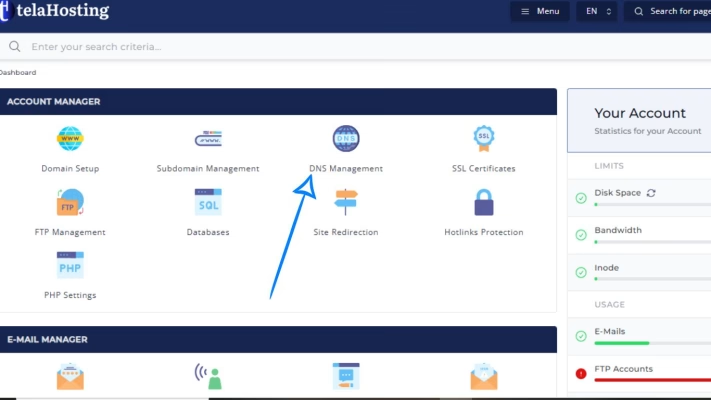
This is where you’ll add all Microsoft 365 DNS records.
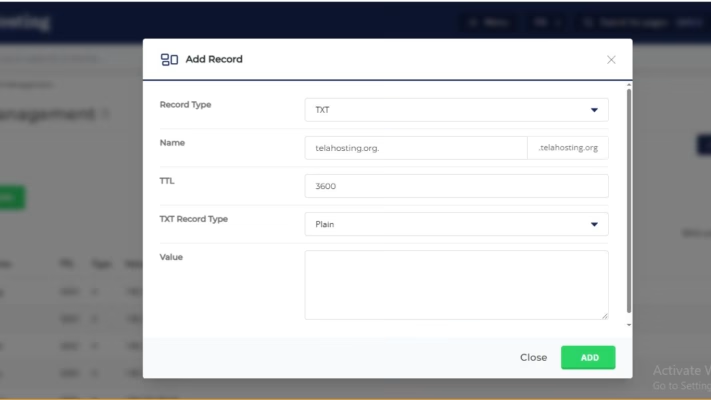
STEP 5: Add the TXT Verification Record
- Click Add Record
- Choose TXT Record
- Name: leave blank or enter your domain
- Value: paste the Microsoft TXT record (MS=ms#####)
- Save
That’s all — verification TXT is done.
STEP 6: Return to Microsoft Admin and Complete Verification
Back in Microsoft 365 Admin:
- Click Verify
- Wait a few minutes for DNS propagation
Once verified, Microsoft will tell you to add your email records.
Now we add the main ones.
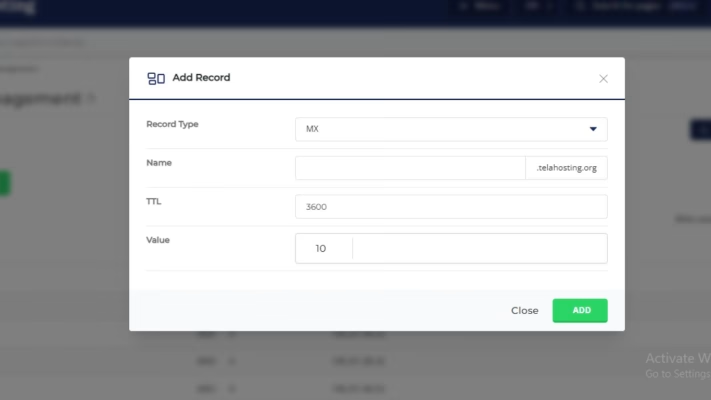
STEP 7: Add Microsoft 365 MX Record in DirectAdmin
Microsoft gives one main MX record:
- Priority: 0
- Server: your-domain-key.mail.protection.outlook.com
To add it:
- Go to DNS Management
- Delete ALL existing MX records
- Click Add Record → MX
- Priority: 0
- Value: your-domain-key.mail.protection.outlook.com
- Save
This routes all your email to Microsoft Exchange Online.
STEP 8: Add SPF Record (TXT)
To avoid spam and improve email delivery, add this SPF: v=spf1 include:spf.protection.outlook.com -all
Inside DNS:
- Click Add Record
- Choose TXT Record
- Name: leave blank
- Value: paste the SPF above
- Save
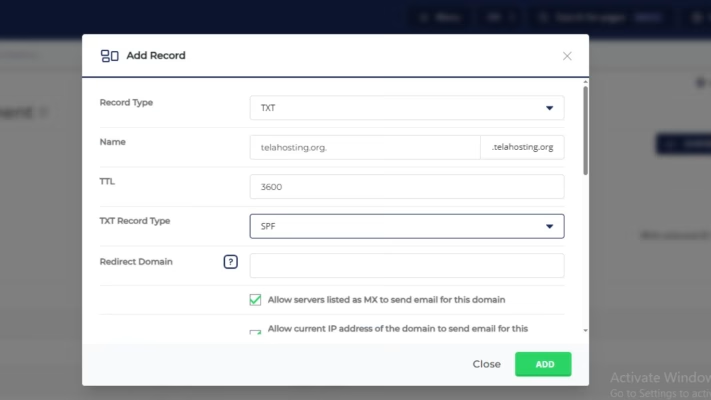
If you already have an SPF record, replace it — only ONE is allowed.
STEP 9: Add CNAME Records for Microsoft 365
Microsoft gives several CNAME records for services like Autodiscover, Teams, SharePoint, etc.
Add each one exactly as provided. Common Microsoft 365 CNAMEs include:
| Name | Type | Value |
| autodiscover | CNAME | autodiscover.outlook.com |
| sip | CNAME | sipdir.online.lync.com |
| lyncdiscover | CNAME | webdir.online.lync.com |
| enterpriseregistration | CNAME | enterpriseregistration.windows.net |
| enterpriseenrollment | CNAME | enterpriseenrollment.manage.microsoft.com |
Add them one by one inside DNS Management.
STEP 10: Add Microsoft 365 SRV Records
Two SRV records are required for Skype/Teams connectivity.
Example:
Record 1
- Service: _sip
- Protocol: _tls
- Port: 443
- Target: sipdir.online.lync.com
- Priority: 100
- Weight: 1
Record 2
- Service: _sipfederationtls
- Protocol: _tcp
- Port: 5061
- Target: sipfed.online.lync.com
- Priority: 100
- Weight: 1
Inside DirectAdmin:
- Click Add Record
- Choose SRV
- Fill in the fields exactly
- Save each record
These enable calling, meetings, and Teams features.
STEP 11: Disable “Local Mail Server” in DirectAdmin
Since email is now handled by Microsoft, DirectAdmin must NOT try to receive email.
To fix this:
- Go to Email Manager
- Click MX Records
- Turn Local Mail Server → OFF
If you don’t do this, emails may disappear or bounce.
STEP 12: Test DNS Propagation
Use these tools:
Check:
✔ MX
✔ SPF
✔ TXT
✔ CNAME
✔ SRV
Once all records show globally, everything is active.
STEP 13: Test Your Microsoft 365 Email
Try sending and receiving emails from:
- Outlook.com
- Gmail
- Yahoo
- Mobile apps
- Outlook desktop
If everything works, your setup is complete.
Conclusion
With the right MX, SPF, CNAME, and SRV records in place, your domain will be fully connected to Exchange Online and ready for professional communication.
This setup gives you reliable email, better deliverability, and access to all Microsoft business tools — from Teams to SharePoint.
FAQs
1. How long does DNS propagation take for Microsoft 365?
Most updates show within 10–30 minutes, but full propagation may take up to 24 hours.
2. Can I keep telaHosting email and Microsoft 365 at the same time?
No — you must choose one provider for managing your email.
3. Why are my Microsoft 365 emails not receiving?
You may have forgotten to disable Local Mail Server in DirectAdmin.
4. Do I need all Microsoft 365 CNAME records?
Yes. They enable features like Autodiscover, Teams, and SharePoint.
5. What happens if I enter the wrong DNS records?
You can delete and re-enter them immediately — no damage done.
Need help? Our friendly support team is always here for you! Reach out below.
Happy hosting! 🌟