If you’re using Mailchimp or SendGrid to send newsletters or transactional emails, then adding their SPF and DKIM records in DirectAdmin is one step you absolutely cannot skip. These records help email providers trust your domain, reduce spam issues, and improve deliverability.
Why You Need SPF & DKIM for Mailchimp or SendGrid
SPF (Sender Policy Framework)
This tells the world which servers are allowed to send email on behalf of your domain. Without this, your emails may go straight to spam.
DKIM (DomainKeys Identified Mail)
DKIM adds a digital signature to your emails that proves the email is legitimate and hasn’t been tampered with.
Result:
- Better inbox delivery
- Fewer spam warnings
- More trust from Gmail, Yahoo, Outlook, etc.
Now let’s get your records set up.
STEP 1: Log In to DirectAdmin
- Log into your telaHosting Client Area
- Open your hosting package
- Click “Login to DirectAdmin”
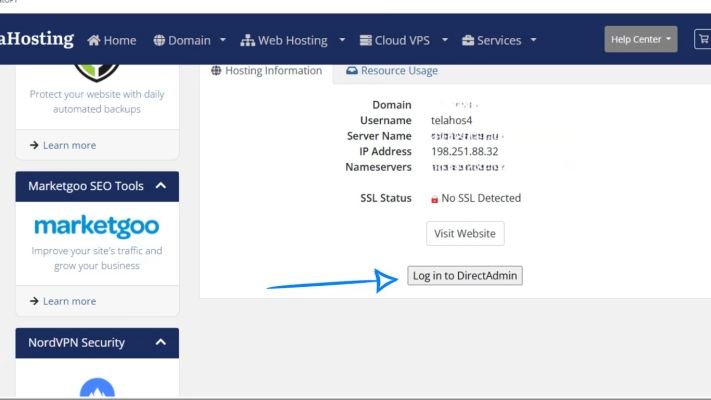
Once inside, you’re ready to edit DNS settings.
STEP 2: Open DNS Management
Inside DirectAdmin:
- Go to Account Manager
- Click DNS Management
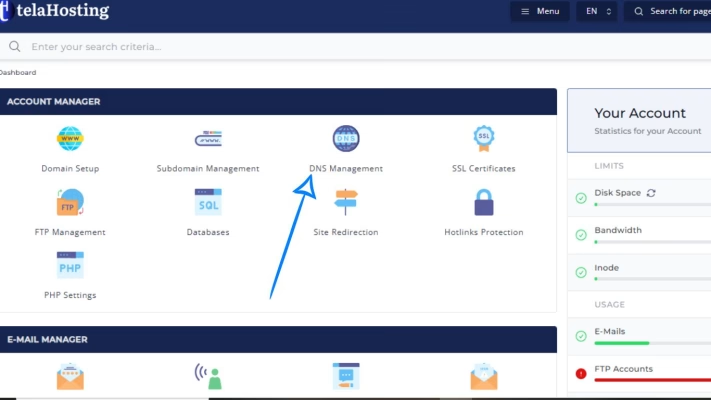
This is where you’ll add the SPF and DKIM entries for Mailchimp or SendGrid.
HOW TO ADD MAILCHIMP SPF & DKIM RECORDS
Mailchimp gives you two main DNS items:
- 1 SPF record
- 2 DKIM CNAME records
Let’s add them.
Mailchimp SPF Record
Mailchimp requires this SPF include: v=spf1 include:servers.mcsv.net ~all
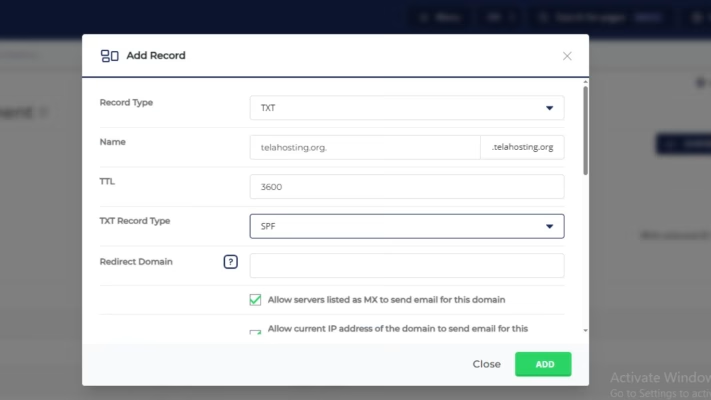
To add SPF:
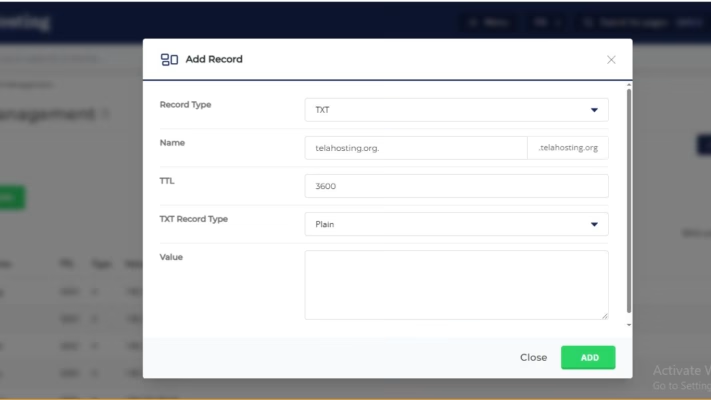
- In DNS Management → Click Add Record
- Choose TXT Record
- Name: leave blank or type your domain
- Value: v=spf1 include:servers.mcsv.net ~all
- Save
If you already have an SPF record, you MUST combine them. Only ONE SPF record is allowed per domain.
Example combined record: v=spf1 include:servers.mcsv.net include:_spf.google.com ~all
(Adjust depending on your setup.)
Mailchimp DKIM Records
Mailchimp gives you two CNAME DKIM records. They usually look like this:
Record 1
- Name: k1._domainkey
- Value: dkim.mcsv.net
Record 2
- Name: k2._domainkey
- Value: dkim2.mcsv.net
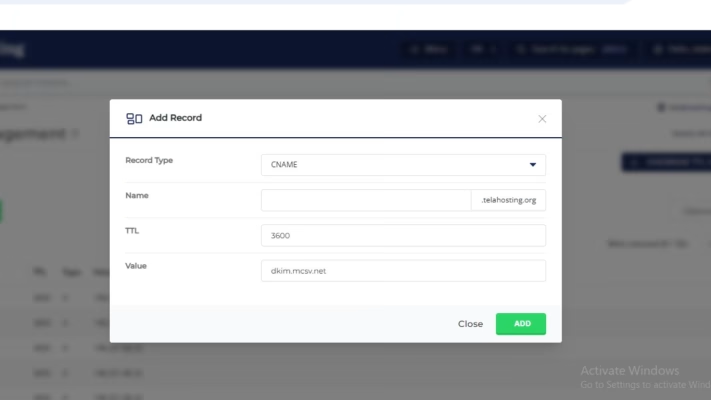
To add DKIM CNAMEs:
- Click Add Record
- Choose CNAME
- Paste the name exactly as Mailchimp provides
- Enter the value
- Save
- Repeat for the second one
After adding them, return to Mailchimp and click Authenticate.
HOW TO ADD SENDGRID SPF & DKIM RECORDS
SendGrid uses 3 DNS records:
- SPF (TXT)
- DKIM (2 CNAMEs)
Let’s set them up in DirectAdmin.
SendGrid SPF Record
SendGrid requires: v=spf1 include:sendgrid.net ~all
To add it:
- Go to DNS Management → Add Record
- Choose TXT Record
- Name: leave blank
- Value: v=spf1 include:sendgrid.net ~all
- Save
If you already have an SPF record, combine them like: v=spf1 include:sendgrid.net include:servers.mcsv.net ~all
SendGrid DKIM Records
SendGrid will show two CNAME DKIM records in your dashboard. They look like this:
Record 1
- Name: s1._domainkey
- Value: s1.domainkey.u1234567.wl.sendgrid.net
Record 2
- Name: s2._domainkey
- Value: s2.domainkey.u1234567.wl.sendgrid.net
To add them:
- Click Add Record
- Select CNAME
- Paste the name and value exactly
- Save
- Repeat for the second record

Once added, go back to SendGrid and click Verify.
STEP 3: Wait for DNS Propagation
DNS changes take a bit of time to update globally. Normally takes 5–15 minutes and up to 24 hour globally
You can check using:
- DNSChecker.org
- MXToolbox.com
Once you see “Success” or “Verified,” your domain is authenticated.
Final Checks Before You Leave
Confirm:
- SPF record exists and contains the required “include”
- DKIM CNAMEs added correctly
- No duplicate SPF records
- No spaces or extra dots added accidentally
This ensures smooth email delivery with Mailchimp or SendGrid.
Conclusion
With these records added:
- Your emails get better inbox placement
- You avoid spam filters
- Your domain becomes trusted
- Your marketing and transactional emails perform better
FAQs
1. Can I have more than one SPF record?
No. You must combine them into one record.
2. Why is my DKIM not verifying?
You may have added an extra dot or space, or propagation is still ongoing.
3. How long does Mailchimp/SengGrid verification take?
Usually 5–20 minutes, sometimes up to an hour.
4. Do I need both SPF and DKIM?
Yes. Both are required for strong deliverability.
5. Do I need DMARC too?
It’s optional, but recommended for extra protection.
Need help? Our friendly support team is always here for you! Reach out below.
Happy hosting! 🌟